Guide
Create an Access Review Report
In order to add an Access Review Report to your governance, you need to:
- Click on “Access” on the Nav Panel.
- Click on “Add Access Review”.
This will take you to the “Access Review Template Library”. In the “Access Review Template Library”, you can search for a template by narrowing down the list of templates by Service and Category.
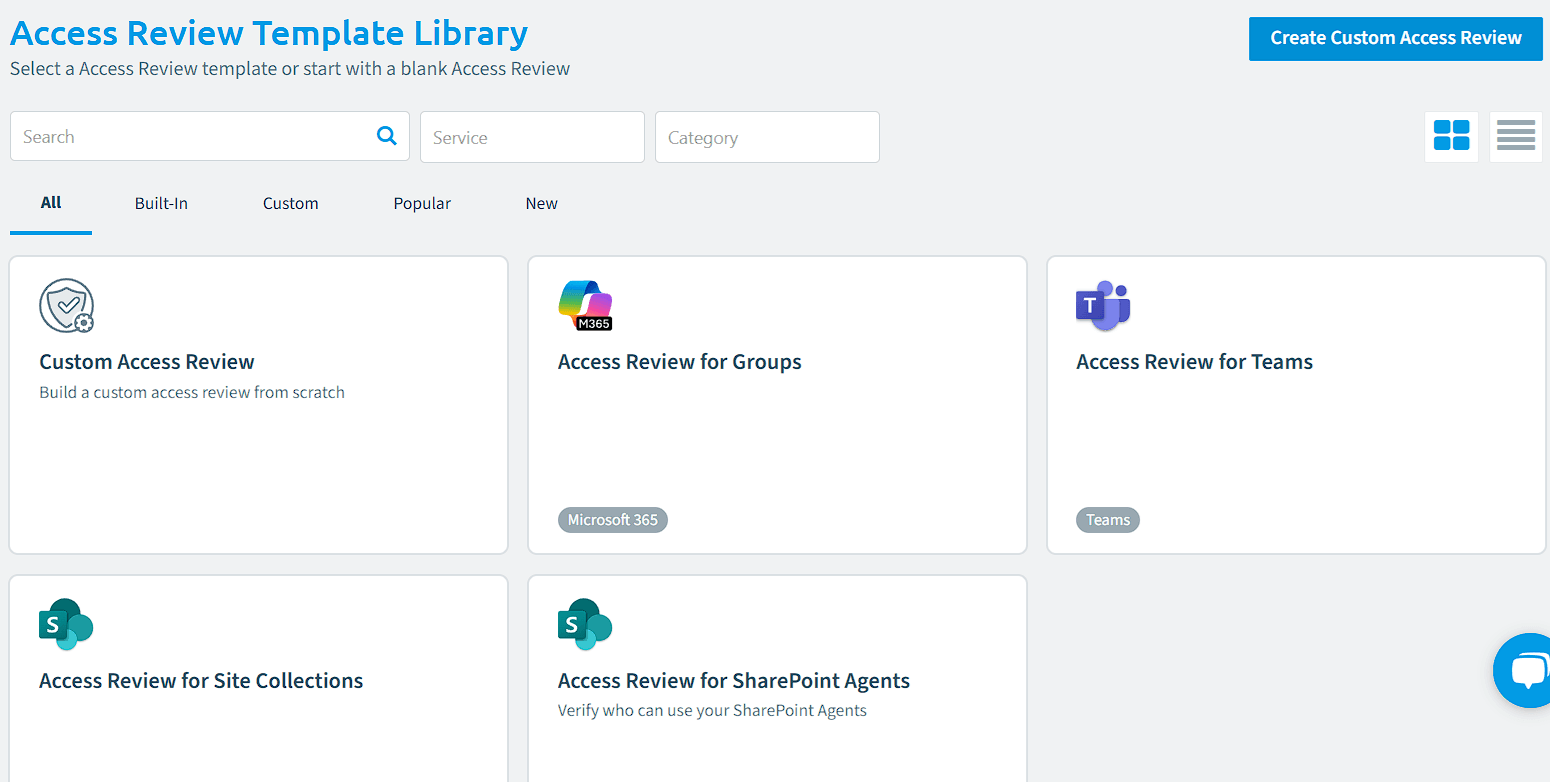
In order to create a report based on a template, choose the template that you want to use this will load the “Access Review Builder” screen.
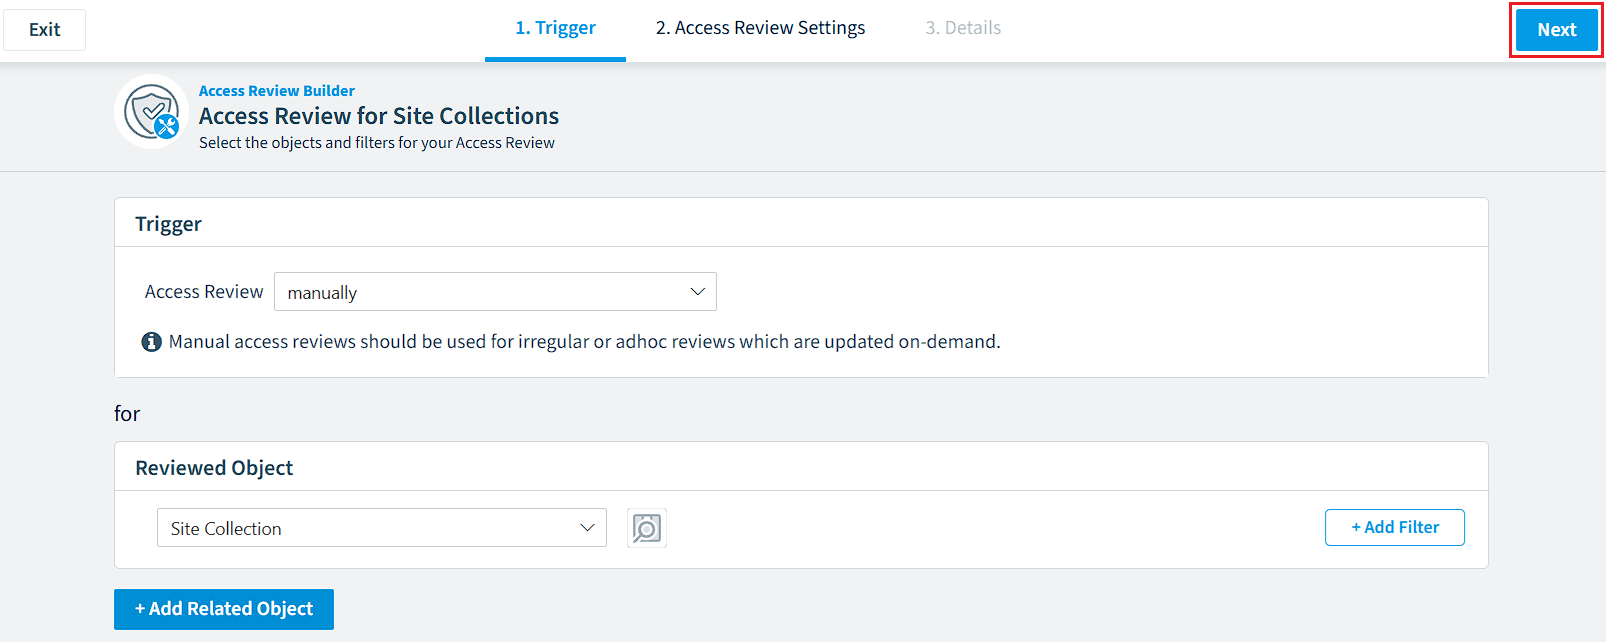
On the Trigger screen
The first stage of an Access Review Report is the trigger.
-
Select what type of trigger the Review will use from either “Manually” or “On Schedule”.
-
Manually: Allows you to refresh the access review directly in the object; this is a one-time review.
-
On Schedule: This means the data is periodically checked and is used as a recurring review of objects.
Choosing either of these options will start the Access Review based on the "Reviewed Object" logic. The difference is whether the review is refreshed manually or on schedule.
-
-
Next, select the Object to be reviewed from the drop-down List.
-
Once happy with the selection and filters, click “Next” in the top right of the screen.
Access Review Settings
The second stage of an Access Review Report is which users will be responsible for reviewing the access (this could be the Managers of a user or the owners of a SharePoint Site Collection…).
Select Reviewer(s)
Depending on what object you selected in the first step will then dictate the automatic option here. (i.e. If you select SharePoint Site Collection, the Owners will now be selected; if you select Flows, then the owners of the Flows will be selected here).
- If you do not want to choose the default reviewers, you can then select the option “Specified users must review and approve permissions” and in the new box, enter the specific users.
Due date to perform the access review
Specify how many days the reviewers have to review the Access after being notified. Select the number of days from the drop-down between 2 and 60 days.
- Also, indicate whether the Reviewer needs to add a comment by checking the option “Require a comment on approval”.
Email Communication
Specify how many days before the review deadline to send a reminder for the reviews. Select the number of days from the drop-down between 1 and 14 days. This option can be toggled on or off.
Once all options have been configured, click “Next” in the top right of the screen.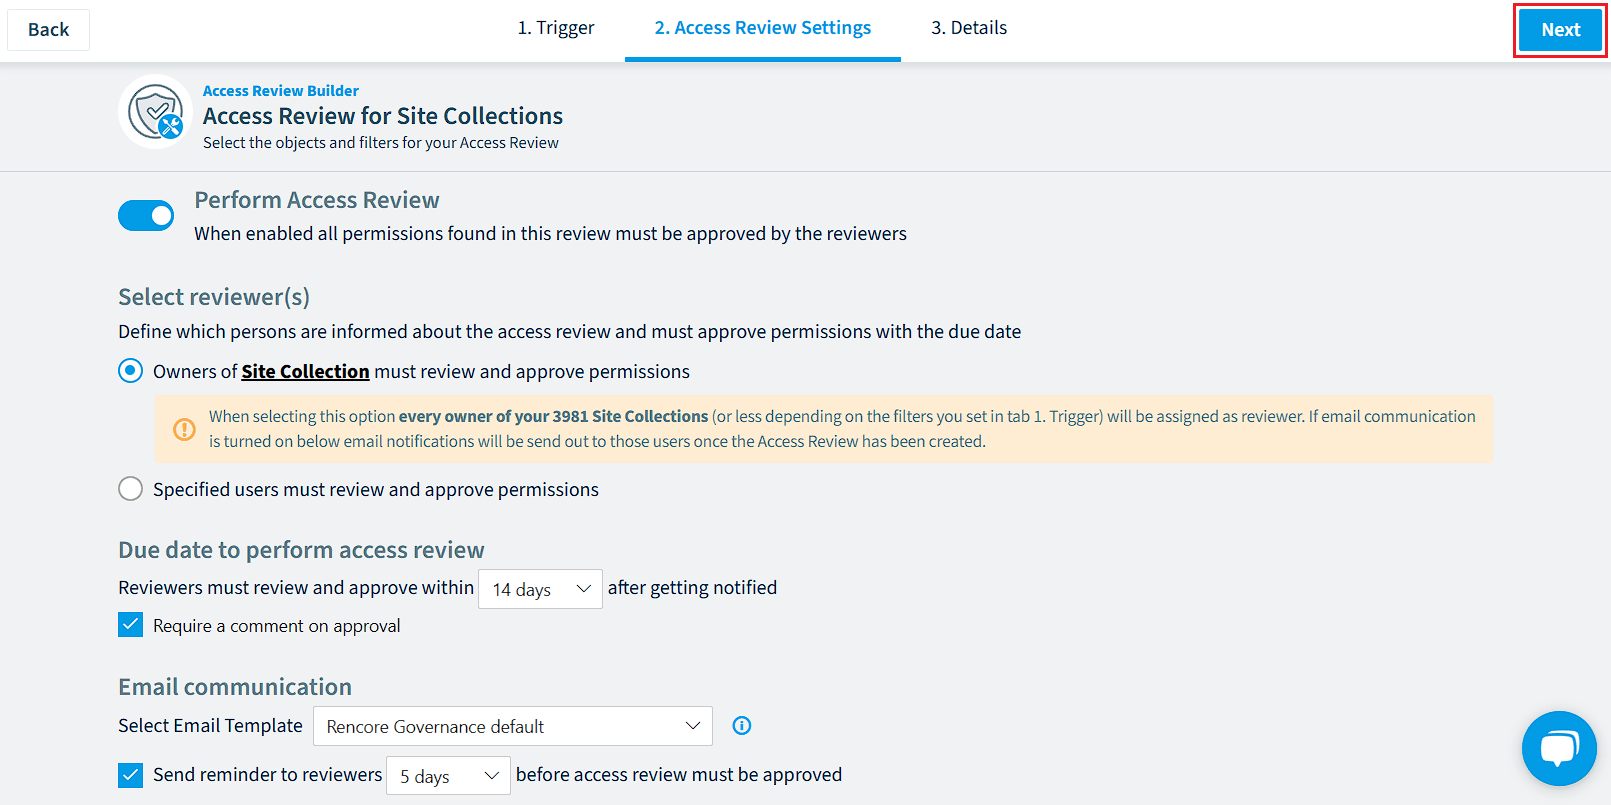
Details
-
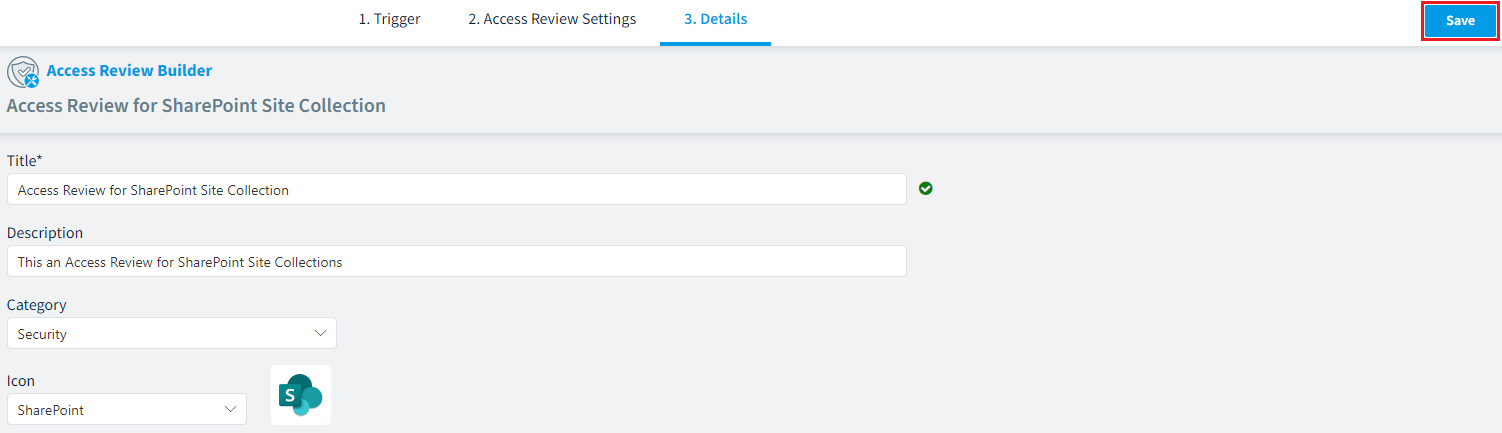
In the “Title” field, enter a unique name for the Access Review. (e.g., Access Review for SharePoint Site Collections).
A Green tick will appear when the title is unique, allowing you to proceed and save the report. -
In the “Description” field, enter a description for the Access Review. (e.g., This is an Access Review for SharePoint Site Collections).
-
Select the desired “Category” from the drop-down for the Access Review.
-
Select the “Icon” for the Access Review from the drop-down; this is usually the service the object belongs to.
-
Once happy with the details, click “Save” in the top right corner.
-
After clicking “Save,” the Access Review will gather data.