Guide
Create a Custom Automation
Automations are automatic process triggers that let you enforce your governance plan by triggering automation built with Power Automate, Azure Functions, Logic Apps, or notifications via Email or Teams whenever a policy is violated.
To create a custom Automation. To create custom automation, you will need to:
-
Click on “Automation” on the Nav Panel
-
Click on the “Add Automation” button on the right-hand side.
-
On the “Automation Template Library”, you can create an automation based on a Library template or create custom automation.
- Click “Create Custom Automation”.

- Click “Create Custom Automation”.
Automation
Trigger
The first stage of creating custom automation is the trigger. You will need to decide what type of trigger the automation will use from either; “Manually”, “On Schedule”, or “On Check Violation” as detailed in “What are the Available Triggers for Automations”.
-
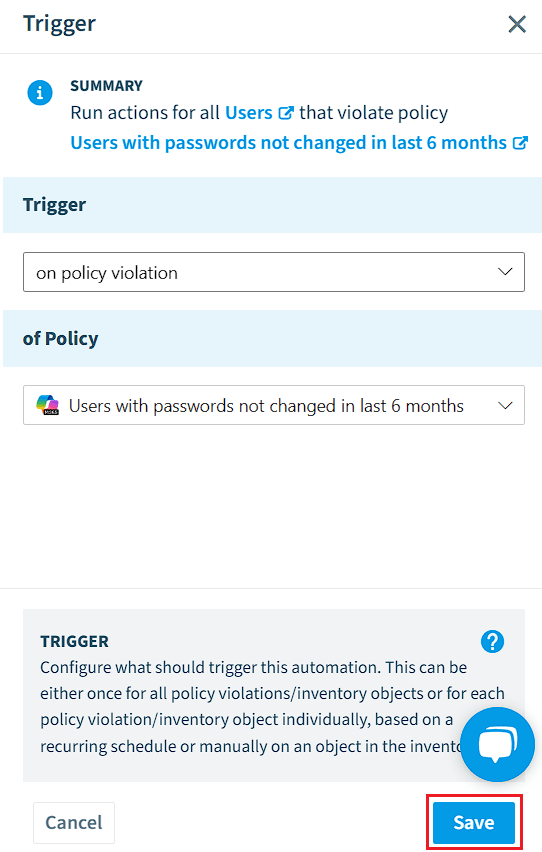
Click on the Trigger in the flow and on the Dialog, choose the Trigger.
-
Depending on the trigger, you will need either,
- Select the inventory object (if “manually” was selected).
- Select a Policy for the trigger to run (if “on policy violation” was selected).
- Select a Policy or Inventory object, and reoccurrence (if “on schedule” was selected).
-
Click “Save” to save the trigger.
Action
Once you have selected the trigger, you will need to add actions for the automation to perform when triggered.
-
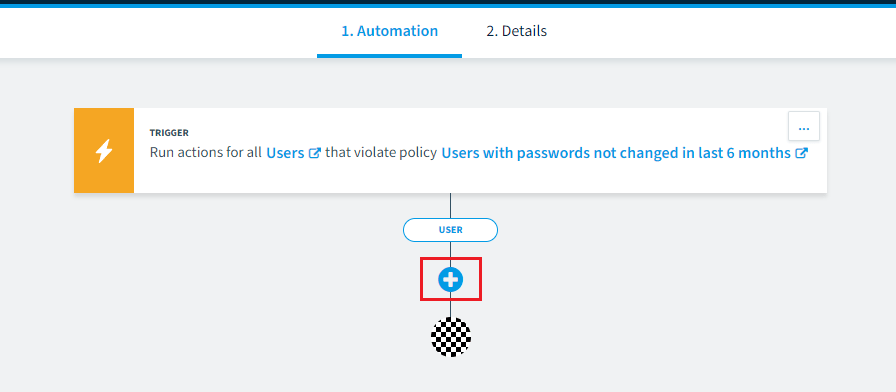
On the Automation Flow, click the ”+” to add the next action.
-
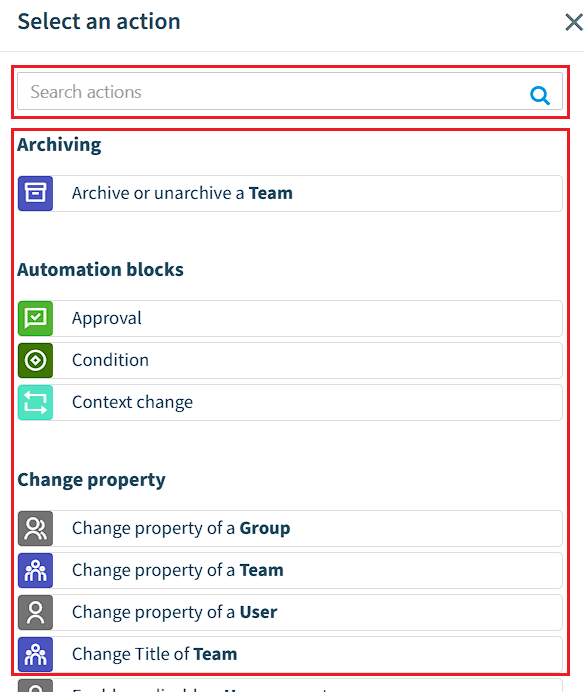
Select the action you want to add from the following categories: (Archiving
Automation blocks, Change property, Change relation, Delete content, Invoke, Request, Modify relation, Notification, Provisioning, Restore, Content, Schedule, Sharing).
 _
_
_- For Example: Select Condition, and fill in the desired filters.
- Once all elements and fields are configured, click “Save”.
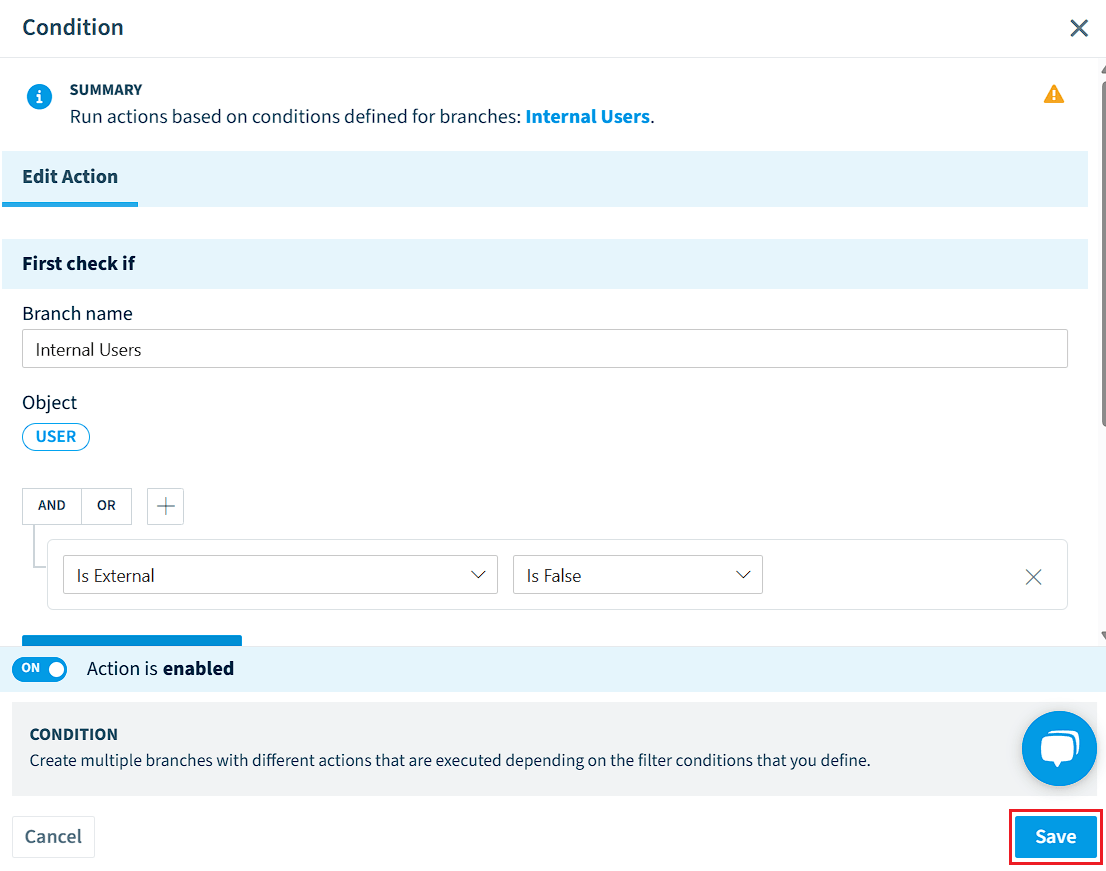
- Add an Action for either branch by clicking the ”+” in each branch (e.g. sending an email). Each time you add an action, you will need to enter the criteria and save the action; repeat as many times as needed.
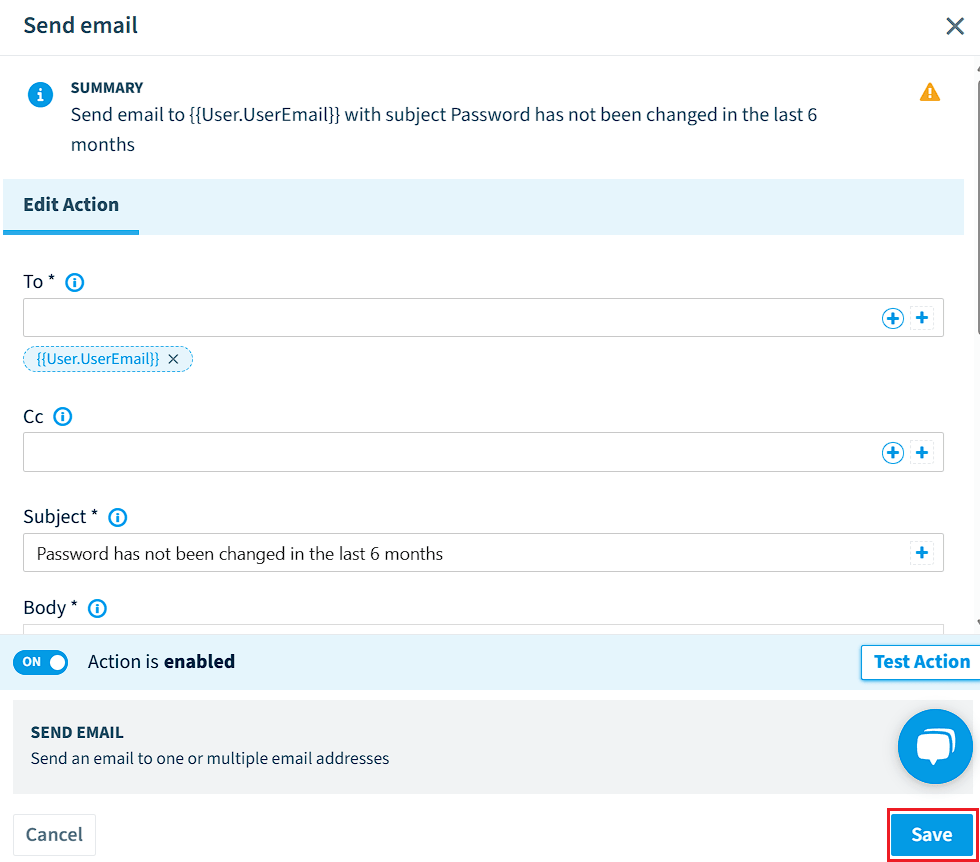
-
Once all the actions have been configured, click “Next” at the top right.
Details
-
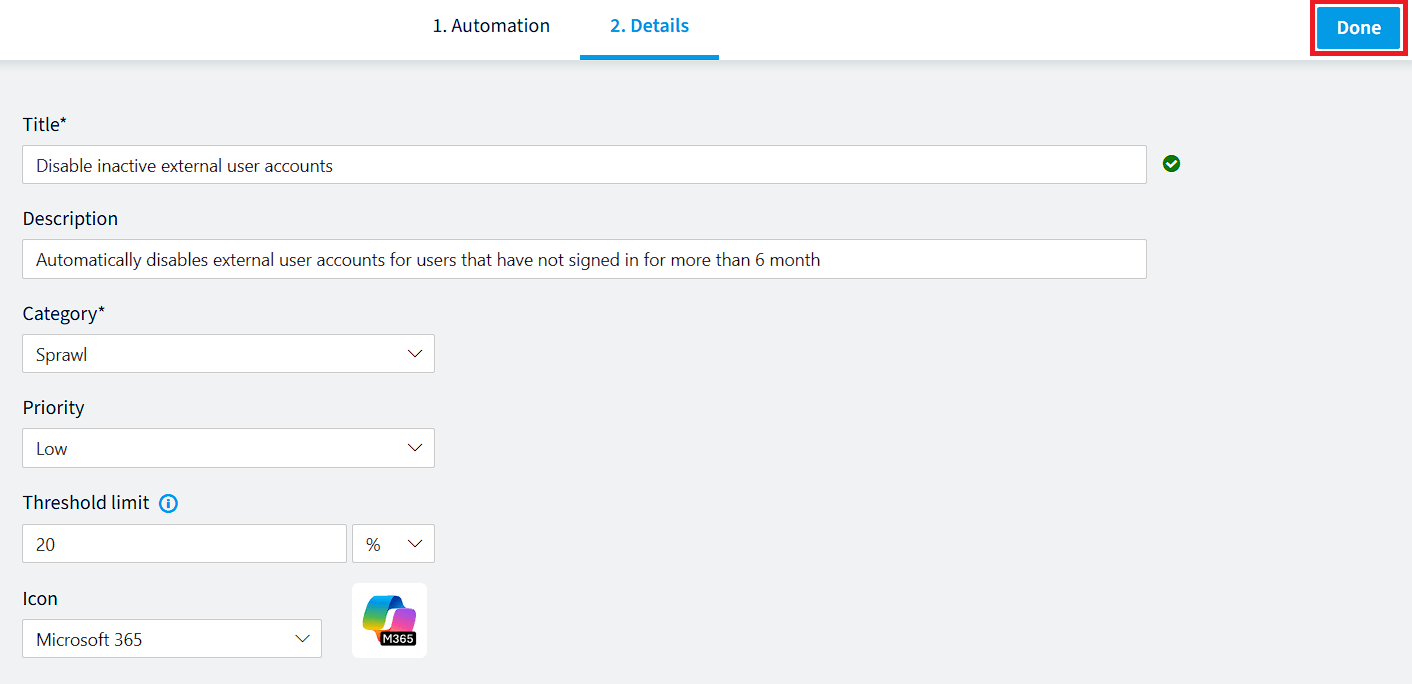
The final stage is to add details for the automation. This includes a Title, Description, Category, and Icon for the automation.
In the “Title” field, enter a unique name for the automation.A Green tick will appear when the title is unique, allowing you to proceed and save the policy. The title is limited to 50 characters in length & the description is limited to 250 characters. -
In the “Description” field, enter a description for the automation.
-
Review the “Category” for the automation or select a new one from the drop-down. Additionally, you can type in a new custom category in the field.
-
Review the “Priority” for the automation, choose between “Low, Medium, and High”. By default, this is set to “Low”, this allows you to set automations that are of higher priority to others.
Info: Priorities do not block each other (for example, "Low" priority will NOT be blocked because a "High" priority automation is scheduled) -
Review the “Threshold limit”. This allows you to set a threshold for the automation based on your data. The amount set can either be a percentage (%) based on your objects or a value (123). Enter the value and select either ”%” or “123”. The default value for this is 20%. Additionally, removing the value and leaving it blank will mean the automation will not have a threshold and will run until complete.
-
For Example.
- Using the default 20% the automation will run for 20% of your total value. For example, if you had 100,000,000 file shares, the automation would run up to 20,000,000 and then stop processing more values. This could be handy if you want the automation to run in bite-sized operations.
- If you set the threshold to 110 value (“123”), the automation will stop processing new items once it has reached 110. As before this could be useful for testing purposes with an “on policy violation” automation.
-
-
Review the Icon for the automation or select a new one from the drop-down. This is usually the service that the object belongs to.
-
Once happy with the details and the automation, click “Done” in the top right corner.
Completion
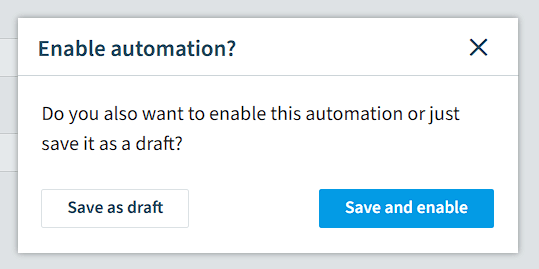
A prompt will appear asking “Do you also want to enable this automation or just save it as a draft?”, if you want to enable it straight away, click the “Save and enable” button. If you just want to save it without enabling then click the “Save as draft” button.
After selecting an option, you will be loaded into the details page of the Automation.