Guide
Connect a Tenant to a Workspace
Rencore Governance includes demo data by default, but you can also try the product with your own data or once you have an active subscription. After creating a workspace, you’ll need to connect your tenant to start governing it. To do this, you will need to:
-
Either click “Connect tenant now” on the banner at the top of the screen.

-
Or, click on “Settings”.
- Click on “Workspace Settings” and click on “Environments”.
- Click “Connect now”.
-

-
Stage 1
-
On the “Connect your tenant” screen, click “Connect” in Stage 1.
- You will then need to sign in to your tenant with an admin account.
-
After you return to the “Connect your tenant” screen, you will see the tenant that you have connected to, along with the user account used.
Stage 2
-
Next in Stage 2 (Consent), you need to give consent for Rencore Governance to scan your tenant. Here, you can either grant Global consent or Consent per service. (We recommend granting permission per service, as this gives more control over the Apps and permission to your tenant at a later date.)
-
To give consent, click “Give Consent” against the services. You will then need to enter an admin account that will grant access.
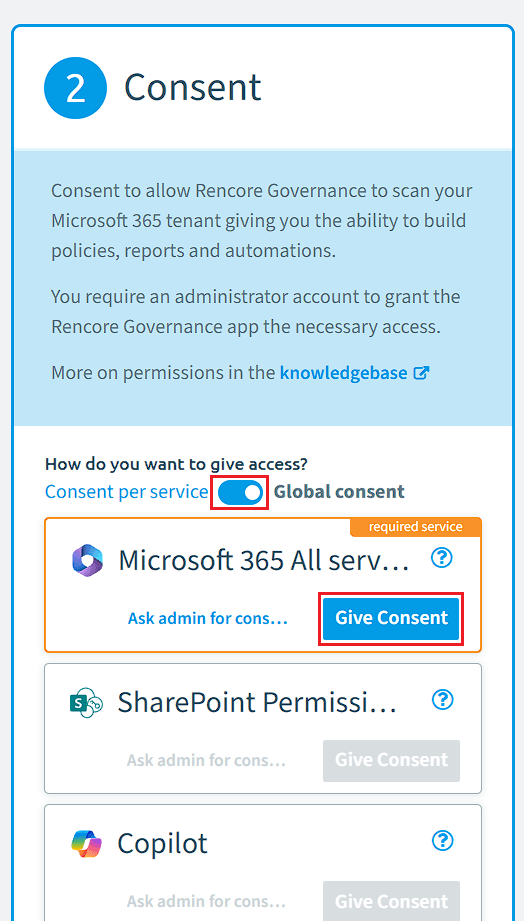 Tip: Clicking the [?] against each service displays a dialog box with the required permissions and what it allows Rencore Governance to scan.
Some Services require additional steps to grant consent (follow the links below for the required services).
Stage 3
-
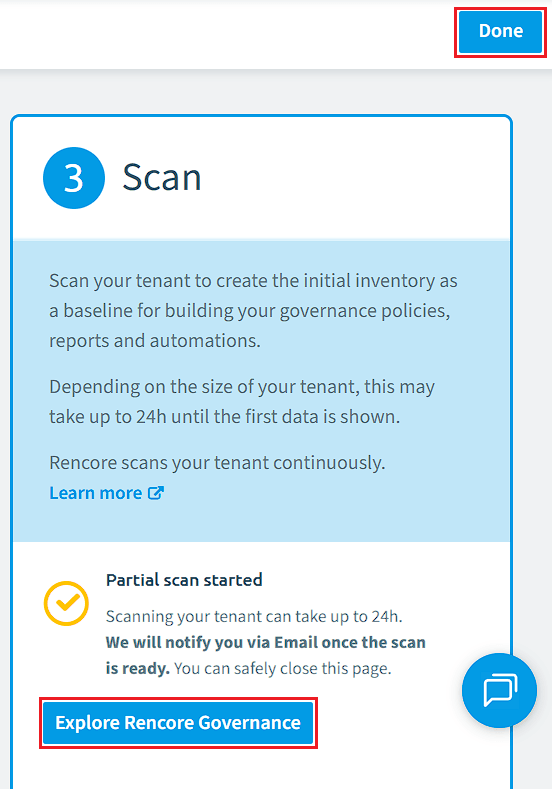
Once complete, click “Done” at the top of the page or click “Explore Rencore Governance” in Stage 3(Scan), which will take you back to the Homepage of Rencore Governance.