Reference
Dataverse and Copilot Studio
Authentication for Copilot Studio in Rencore Governance operates differently from other services. Instead of an automated setup, the Entra ID application must be manually created within the specific tenant designated for scanning. This manual process ensures proper integration and allows Rencore Governance to access the necessary resources securely.
Create an Entra ID App
-
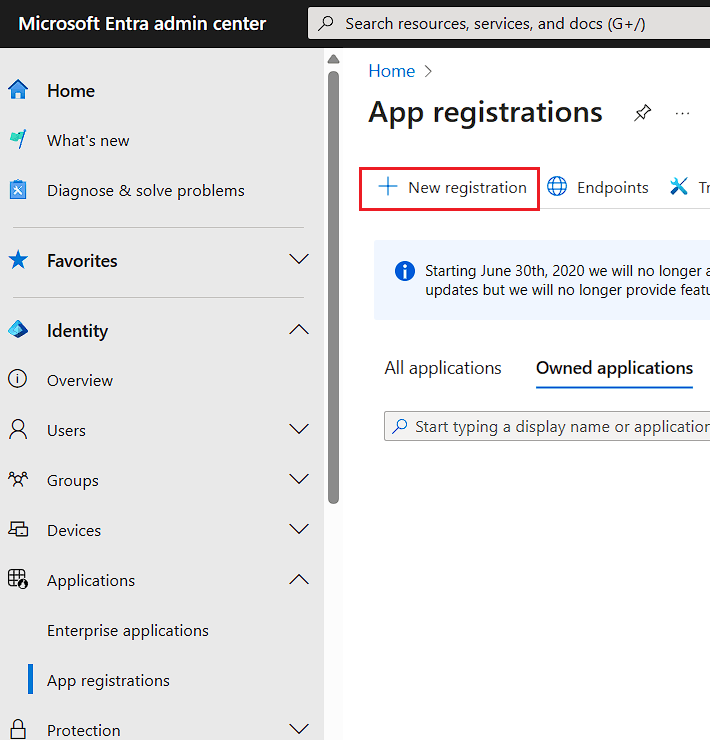
Go to the Microsoft Entra Admin Center.
-
In the left-hand navigation menu, go to “Identity”.
-
Then click on “Applications” and “App registrations”.
-
At the top of this page, click ”+ New registration”.
- In “Name” enter “Dataverse Access for Rencore Governance”.
- For “Supported account types”, select “Accounts in this organizational directory only”.
- Click “Register”.
Create a Client Secret
Once the app is created under “Manage”.
-
Click on “Certificates & secrets”.
-
Select “Client secrets” and then click ”+ New client secret”.
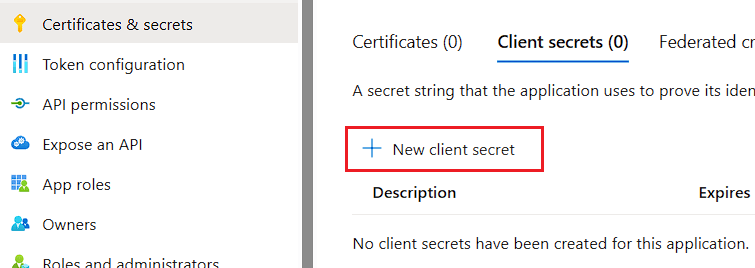
- In the Description enter something like “RencoreGovernance_Copilot2025”.
- Set “Expires” to “Recommended: 180 days (6 months)”.
- Click “Add”.
Tip: Copy the Value key immediately, as it will only be displayed once and you will need this later.
Set API Permissions
Again under “Manage” in the “Dataverse Access for Rencore Governance”
-
Click on “API permission”.
-
Click ”+ Add a permission”.
-
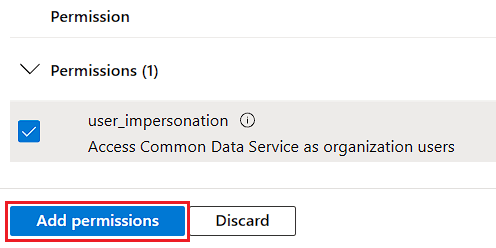
Select “Dynamics CRM”.
-
Select “user_impersonation”.
-
Click “Add permissions”.
-
Power Platform Admin Security Role
-
Go to the Power Platform Admin Center.
-
Click on an Environment that you want to include.
-
Make sure you are a “System Administrator” of the Environment.
- Click on “Membership” on the top Navbar.
- On the new Dialogue window, click ”+ Add me”.
-
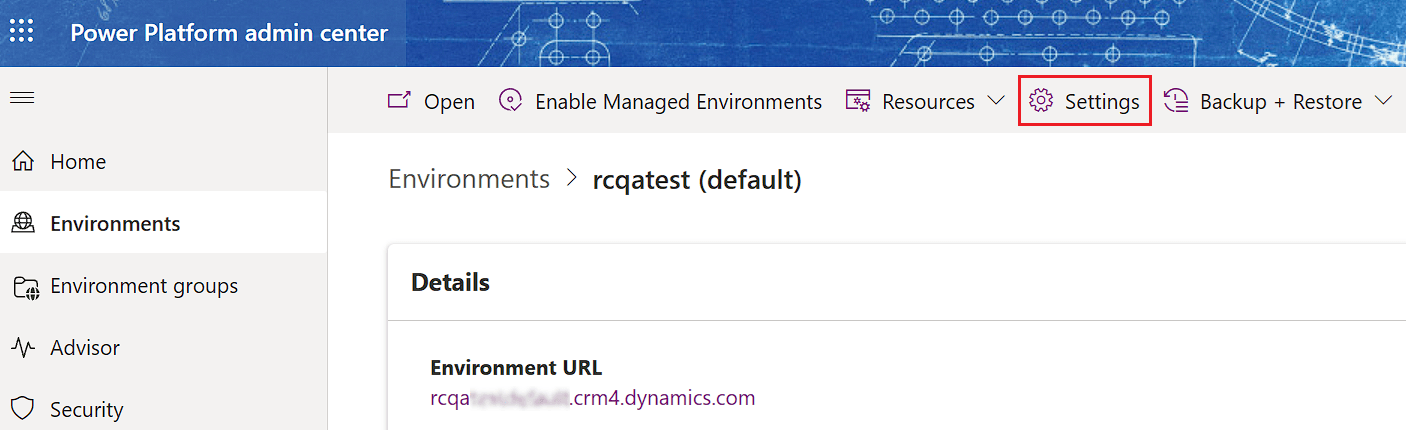
Return to the Environment details page and click on “Settings” on the top Navbar.
-
Under the “Users + permissions” heading, click “Security roles”.
-
Click ”+ New role” at the top of the page.
- Enter “Rencore Governance” for the “Role Name”.
- Select the Environment for the “Business unit”.
- Enter “Permission Used for Rencore Governance Copilot Studio” in the “Description”.
- Enter “Dataverse Access for Rencore Governance” in “Applies To”.
- Enter “Read Access to AICOpilot, AIPlugin, Copilot, Copilot component, Copilot component collection, and Conversation Transcript” in “Summary of Core Table Privileges”.
- Leave the other settings alone and click “Save”.
Permissions for the Security Role
In the Security Role Details page of the newly created Role.
-
Use the search function in the top-right of the screen. Enable “Read” for the “Organization” for the following permissions:
Table
Name
AICopilot
aicopilot
AIPlugin
aiplugin
Agent
bot
Agent component
botcomponent
Agent component collection
botcomponentcollection
ConversationTranscript
conversationtransaction
-
Also, make sure that the following permissions are enabled for “Organization” under “Read”:
Table
Name
Organization
organization
Team
team
User
systemuser
-
Manually Create a Dataverse Application User
After creating the Security Role and enabling the desired Permissions, you will need to create a Dataverse application user.
In the Power Platform Admin Center.
-
On the Environment details page, click “See all” under the “S2S Apps” on the right.
-
Click ”+ New app user” above the Navbar.
-
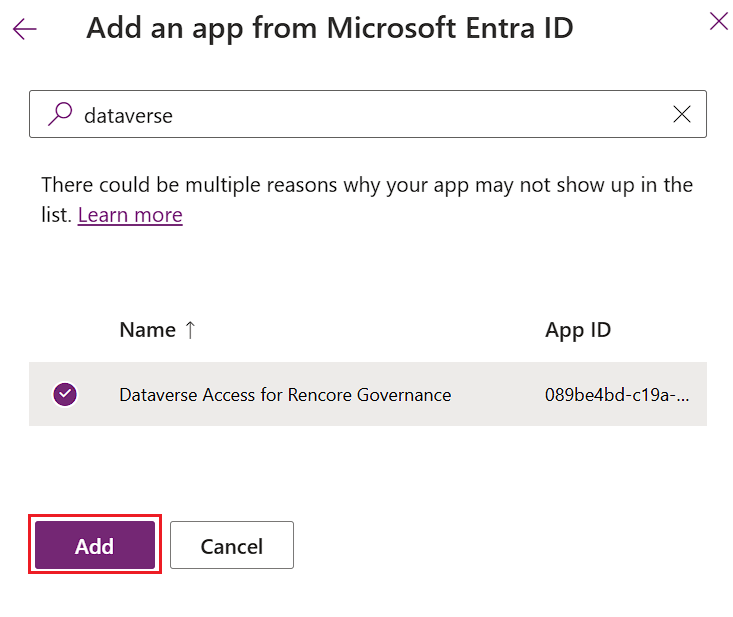
On the new dialogue window ”+ Add an app”
-
In the search type “Dataverse Access for Rencore Governance”
-
Select the app created in the previous steps and click “Add”.
-
Select the desired Environment on the “Business unit”.
-
Click the Pencil next to the “Security roles”.
- Select the role “Rencore Governance”.
- Click “Save”
-
On the “Role assignment confirmation” click “Save”.
-
-
Click “Create”.
Copilot Tenant list settings and Billing policies scan
To be able to execute these API endpoints: https://api.bap.microsoft.com/providers/Microsoft.BusinessAppPlatform/listtenantsettings?api-version=2020-10-01, https://api.powerplatform.com/licensing/billingPolicies?api-version=2022-03-01-preview for the “Tenant Settings” and “Billing policies” inventories, you need to set your Azure AD app as an Admin Management app. This is done via PowerShell.
Here’s the PowerShell script that adds your app as an Admin Management app:
Install-Module -Name Microsoft.PowerApps.Administration.PowerShell

Import-Module Microsoft.PowerApps.Administration.PowerShell

$appId = "CLIENT_ID_FROM_AZURE_APP"

$tenantId = "TENANT_ID"

# Login interactively with a tenant administrator for Power Platform

Add-PowerAppsAccount -Endpoint prod -TenantID $tenantId

# Register a new application, this gives the SPN / client application same permissions as a tenant admin

New-PowerAppManagementApp -ApplicationId $appId