Guide
Create a Custom Report
In order to add a custom report to your governance, you need to:
- Click on “Reports” on the Navbar.
- Click on “Add Report”.
This will take you to the “Report Template Library”.
- Now click on the “Create Custom Report” button in the top-right of the screen.

In the “Report Builder” on the Logic screen:
-
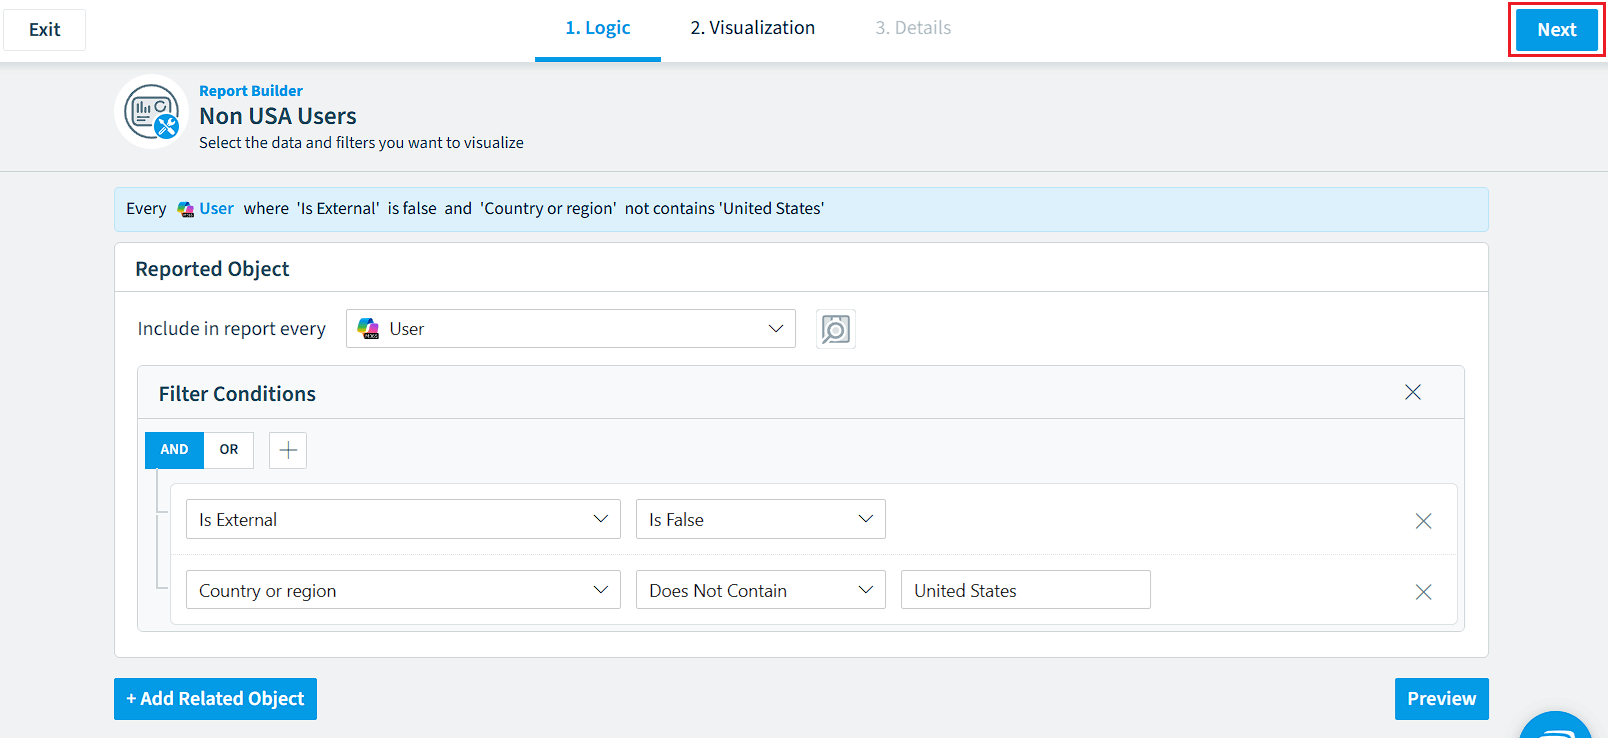
Select the object that the check is reporting the violation on using the drop-down selection (e.g. Users).
-
Click “Add Filter”.
-
Select a field for the “Filter condition”. It is possible to add multiple configurable filter properties by using the “AND/OR” attributes and also add additional related objects to the logic if required.
Example: To show users, not in the United States. Select "Is External" in the field and the query "Is False". Then click the "+" button and choose "Add Condition" then in the new field select "Country or Region" set the query to "Does Not Contain" and in value enter "United States". -
Click the “Preview” button to see a selection of the results from the logic.
-
Once happy with the logic, click “Next” in the top right corner.
On the Visualization screen:
-
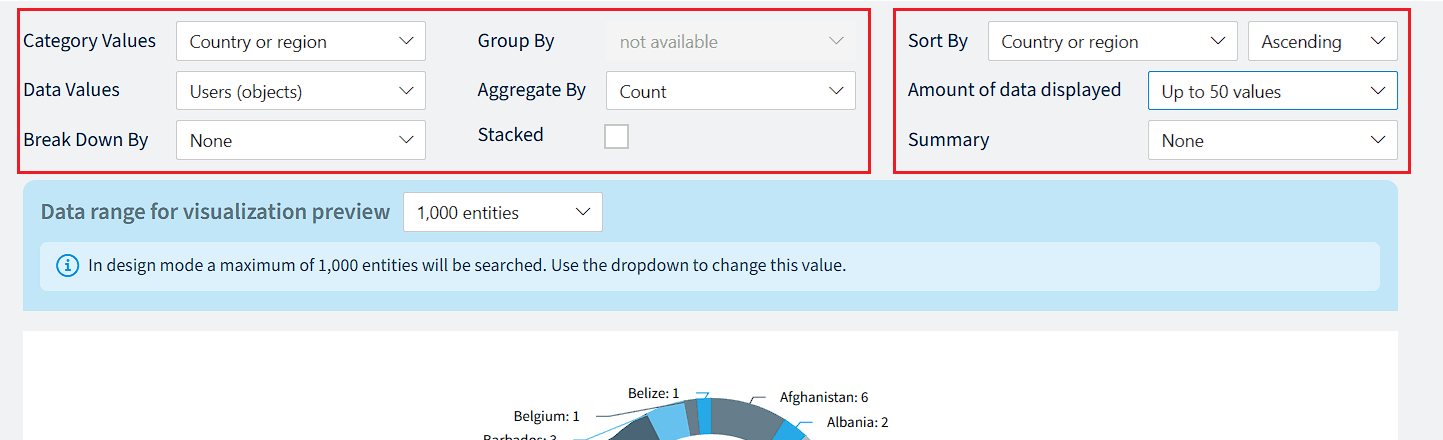
Select the Type of Chart and the Colour theme.

-
Then select how you want to break down the report and how you want to sort the report.
-
Once happy with the layout, click “Next” in the top right corner.
On the Details screen:
-
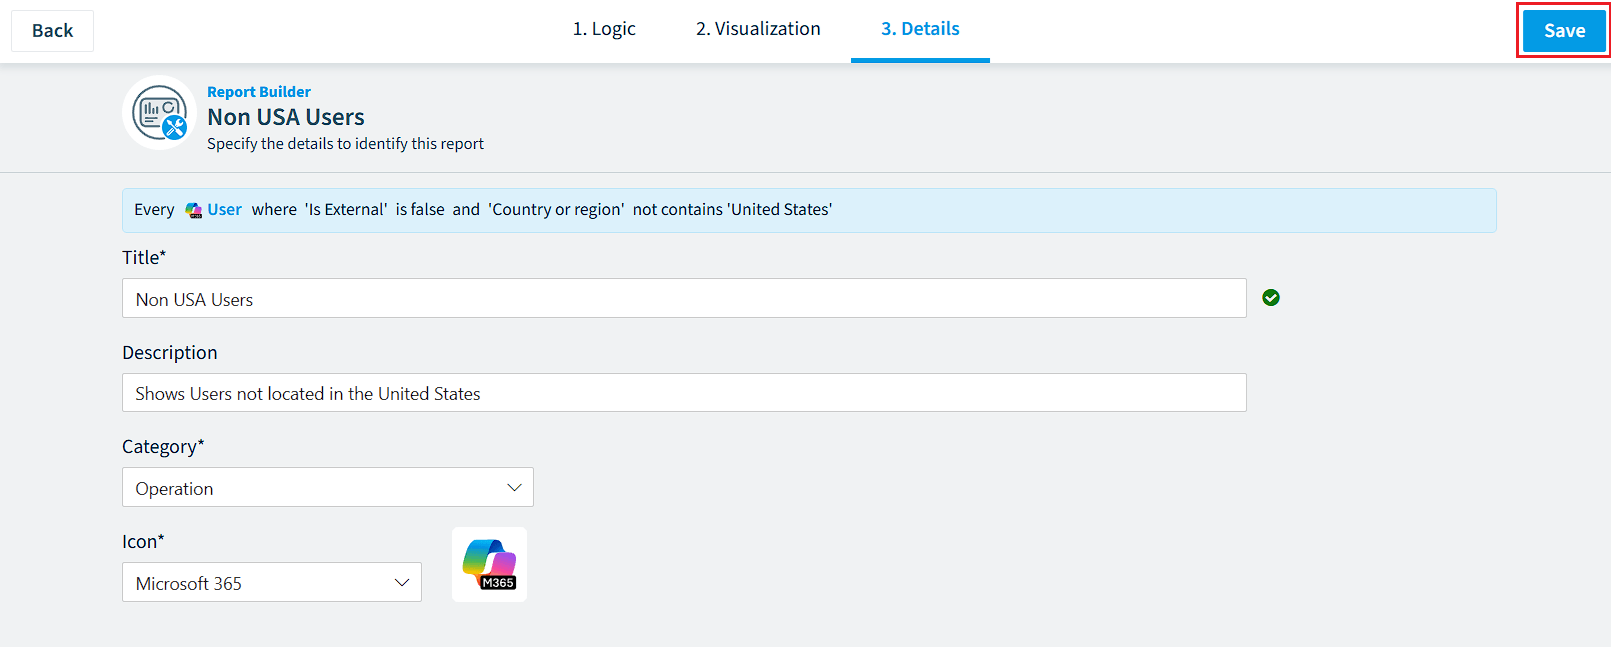
In the “Title” field, enter a unique name for the report. (e.g. Non-USA Users).
A Green tick will appear when the title is unique, allowing you to proceed and save the report. -
In the “Description” field, enter a description for the report. (e.g. Show users that are outside the United States).
-
Select the desired “Category” from the drop-down for the report.
-
Select the “Icon” for the report from the drop-down; this is usually the service the object belongs to.
-
Once happy with the details, click “Save” in the top right corner.
-
After clicking “Save,” the report will begin gathering data and display the results.