Guide
Custom Mail Settings
Rencore Governance, by default, can send out emails; however, this will appear to come from Rencore.com. To change the mail settings to use your account, you will need to:
-
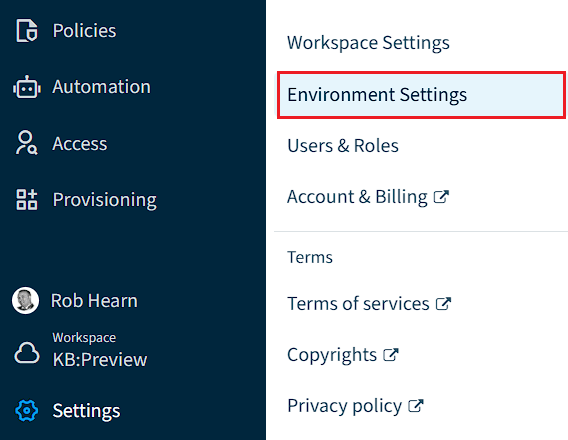
Click on “Settings”.
-
Click on “Environment Settings”.
-
Click on “Mail Settings”.
-
Click on “Custom server”.
-
On the dialog that appears.
-
On “Message Type”, specify how the custom mail settings will be used:
- Automation messages only: Custom mail server will only be used for Automation Messages
- Automation and System messages: Will be used for both Automation and System messages.
-
On “Service Type”, choose from either “Sendgrid”, “SMTP”, or “M365 Account”.
-
SendGrid
In order to set up Rencore Governance to use your SendGrid account, you will need to select this option in the “Service Type” as detailed above and then:
- On “API Key *”, enter the Sendgrid API key you obtained from Sendgrid (as detailed here).
- If a Key is already present, click “Reset”.
- On “Sender Email *”, enter a valid email address that the emails will be sent by (e.g. [email protected]).
- On “Sender Display Name *”, enter a display name.
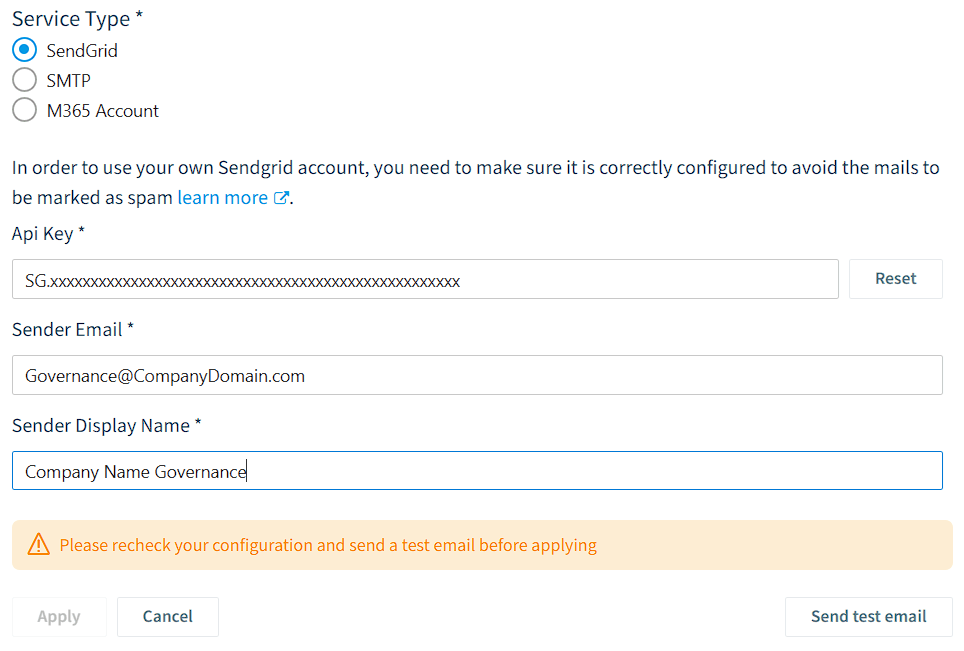
- Click “Send test email” to test the settings and the results.
- Click “Apply” to save the setting.
SMTP
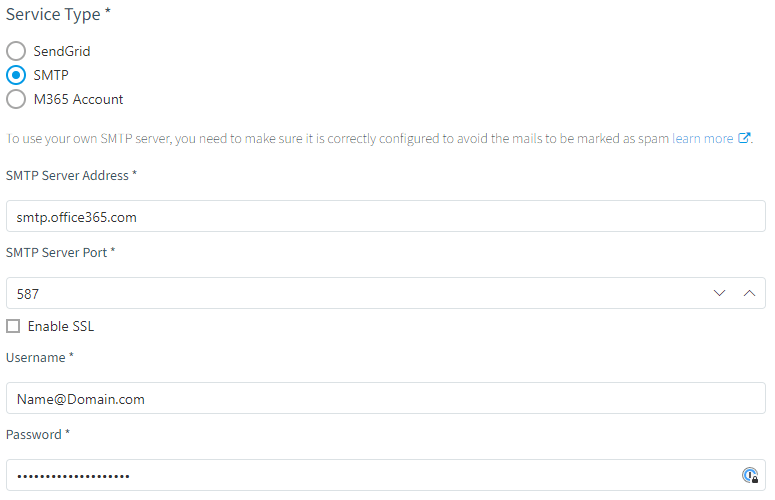
To set up Rencore Governance to use SMTP you will first need to configure an SMTP server (e.g. as detailed here for M365 or here for Google). Once this has been configured, you will need to select this option in the “Service Type” as detailed above, and then:
-
On “SMTP Server Address *”, enter the server address (e.g smtp.gmail.com).
-
On “SMTP Server Port *”, enter the port and whether or not it is SSL.
-
On Sender Email: Enter a custom Sender Email, if the Username is not an email address.
-
On “Username *”, enter your Username. (for example [email protected])
-
On “Password *”, enter the password for the account. (Make sure that you sign into the account before you set up the configuration)
-
Click “Send test email” to test the settings and the results.
-
Click “Apply” to save the setting.
M365
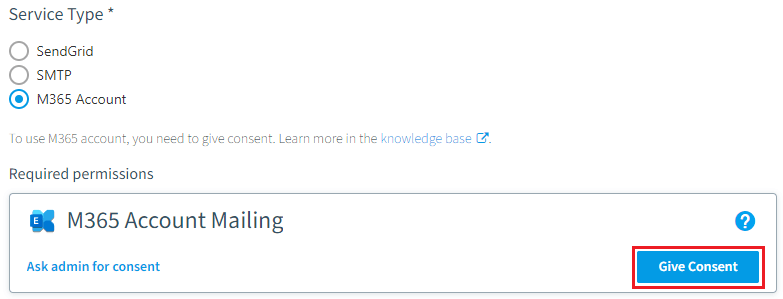
To set up Rencore Governance to use M365, you will need to select this option in the “Service Type” as detailed above, and then either;
-
“Give Consent”. This will warn that the user needs to have specific roles and licenses.
- Click “Give delegated consent”.
- Sign in with your credentials as long as they meet the criteria below.
- Read the information in the dialogue window.
- Enable “Consent on behalf of your organization”.
- Click “Accept”.
In order to execute all operations correctly, please ensure that the user account used for granting these permissions has the following roles and licenses:
• Please assign a license that allows owning an Exchange mailbox (e.g. E3 license) to this user.
• Please ensure the mailbox for the user has been created. To proceed,
-
“Ask admin for consent”.
-
This will provide a URL; either copy this and provide it to the global admin of your tenant to start the consent process.
- Or, click “Send link as mail,” which will populate an email in your default Email app. Simply enter the email address of the global admin and send the email.
-
Click “Send test email” to test the settings and the results.
-
Click “Apply” to save the setting.
-