Guide
Using a PnP Provisioning Template
Microsoft PnP (Patterns and Practices) is a crucial initiative by Microsoft and community members that provides best practices, tools, and templates primarily for cloud solutions. Originating from SharePoint, it now encompasses broader Microsoft 365 applications. A significant highlight of PnP is its robust templates and provisioning, ensuring consistent and optimized deployments.
To extend the capabilities of Rencore Governance within provisioning of workspaces we can incorporate PnP templates to further customize and improve the user experience. An example of a basic PnP template can look like this:
<?xml version="1.0" encoding="utf-8"?>
<pnp:Provisioning xmlns:pnp="http://schemas.dev.office.com/PnP/2022/09/ProvisioningSchema"
    Author="Sven Seidenberg"
    Description="Example Provisioning Template for Teams"
    DisplayName="Teams Provisioning">
    <pnp:Teams>
    <!-- Displayname, Description and Visibility will be taken from Rencore Governance settings and not be changed to your template settings-->
        <pnp:Team DisplayName="Placeholder" Description="Placeholder" Visibility="Private">
            <pnp:Security>
                <pnp:Owners>
                    <pnp:User UserPrincipalName="[email protected]"/>
                </pnp:Owners>
                <pnp:Members>
                    <pnp:User UserPrincipalName="[email protected]"/>
                </pnp:Members>
            </pnp:Security>
            <pnp:Channels>
                <pnp:Channel
                    DisplayName="General"
                    Description="General">
                </pnp:Channel>
                <pnp:Channel
                    DisplayName="Standard Channel"
                    Description="This is just a standard channel">
                </pnp:Channel>
                <pnp:Channel
                    DisplayName="Secret Channel"
                    Description="This is a private channel"
                    MembershipType="Private">
                </pnp:Channel>
            </pnp:Channels>
        </pnp:Team>
    </pnp:Teams>
</pnp:Provisioning>
With this template, you can achieve a greater customization and you can also force some actions to be taken without showing it within the Rencore Nova provisioning template. In this case, we can always add certain people as members or owners, and we can add a standard/private channel. To add a new PnP template to your library you need to create a template i.e. the one above as an XML file and follow these steps:
- Click “Provisioning” on the Nav Panel.
- Click “Manage Provisioning Templates”.
- Click on the “Ellipse menu” ([…]) in the top-right corner.
- Select “Edit managed entities”.
- Select “PnP Templates”
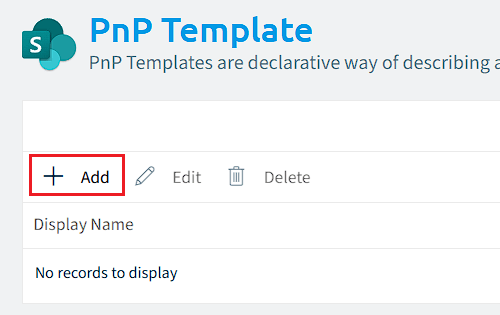
- Click ”+ Add”.
- Click “Browse”.
- Navigate to the .pnp template file, select it, and click “Open”.
- Enter a Display Name and Description for the Template.
- Click “Save.”
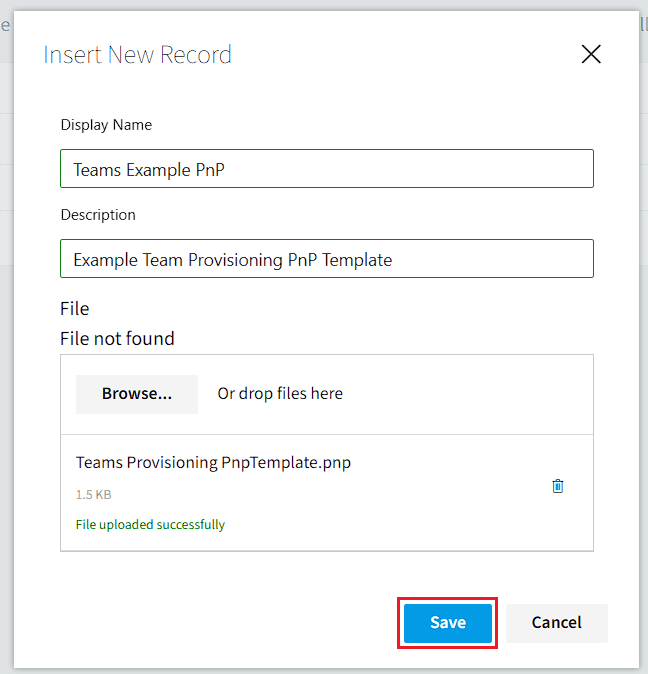
To add a PnP template to a provisioning template within Rencore Governance, you can follow these steps.
More things you can achieve with a PnP template
There are more possible actions than we have shown above. Using a PnP template, you can:
- Add certain users as members or owners
- Add standard and private channels
- Add apps and tabs to a channel
- Manipulate settings and many more
PnP Limitations in provisioning
There are some limitations on features that PnP does not yet support:
- Creation of shared channels