Guide
Creating a Provisioning Team Template
To create a custom Provisioning Template for your governance, you need to:
- Click on “Provisioning” on the Nav Panel.
- Click “Manage Provisioning Template”.
- Click “Create provisioning template”.
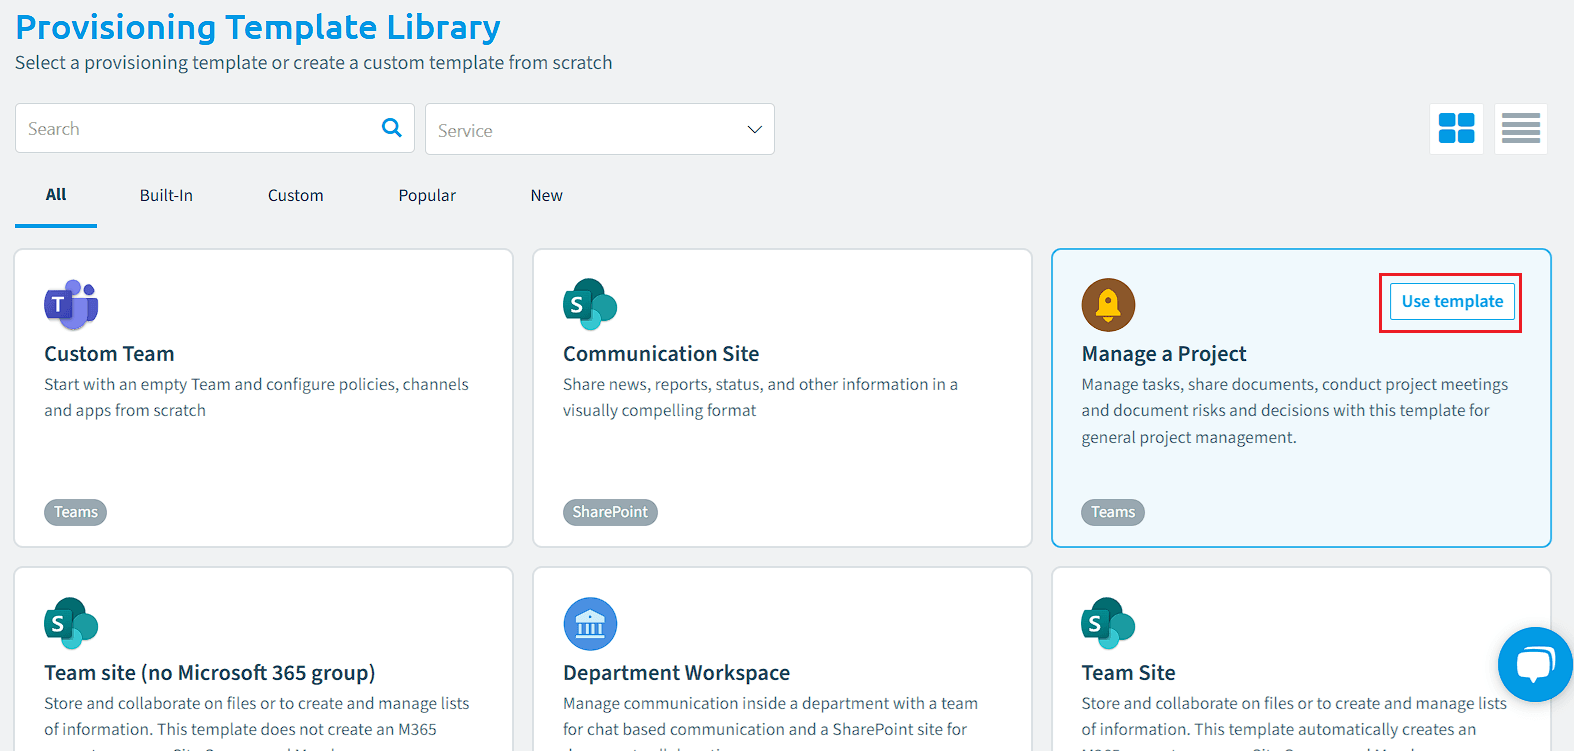
This will take you to the “Provisioning Template Library”. In the “Provisioning Template Library”, you can search for a template by narrowing down the list of templates by Service.
-
To select a template, highlight the one you prefer and then click “Use this Template”.
-
This will load the predefined template into the builder. Where you will need to configure the
- Template Settings
- Provisioning Settings
- Approval
Template Settings
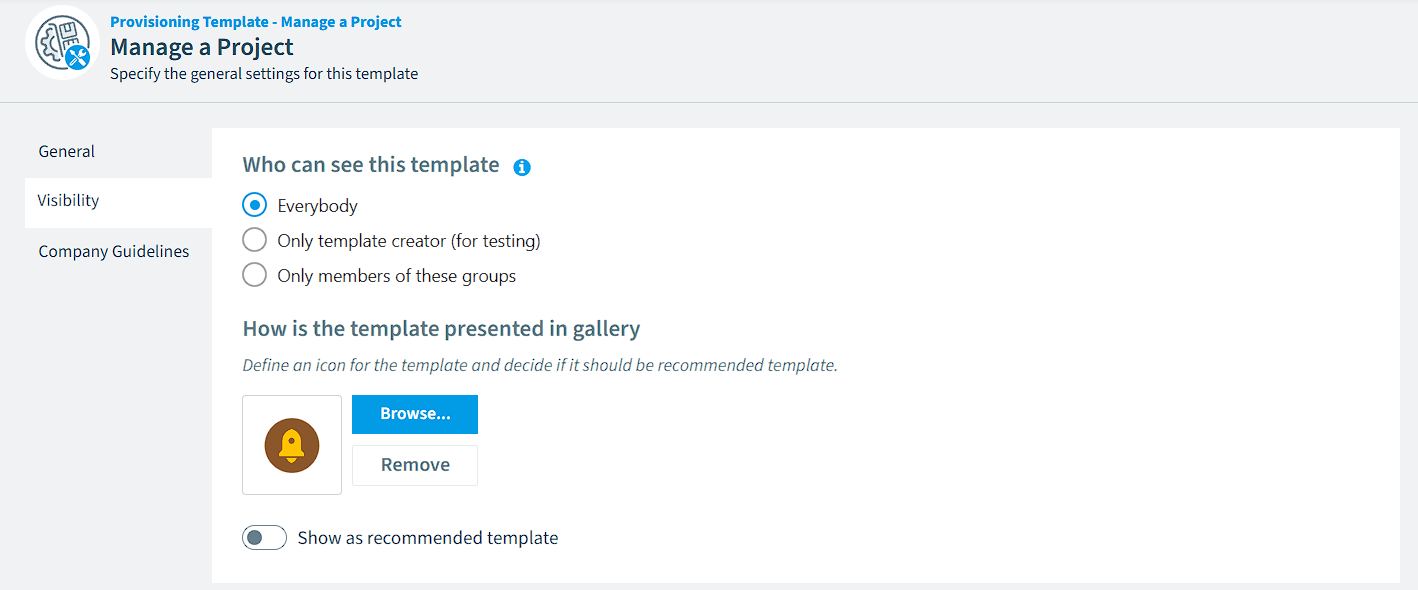
After selecting a template from the Library, any predefined details will be loaded into the template builder. The first is the “Template Settings” where you specify the general, visibility, and company guidelines settings for the template.
To customize the template, you will need to make some changes based on your desired usage.
General
- Title: Specify a unique title for the template. This template will be visible in the Template Gallery.
- Description: Describe the template to assist users in selecting the appropriate one.
Visibility
-
Who can see this template: This setting defines who has permission to view the template in the “Template Library”.
- Everybody: Selecting this allows all users to see the template.
- Only Me ( for testing): Selecting this means only you can view the template and this is used when testing new templates.
- Only members of these groups: Selecting this allows you to specify which groups you want members of to see the template.
-
How is the template presented in gallery: This allows you to select an icon for the template in the Template Library, you can also select whether or not the template is a recommended template.
- To add an icon, click “Browse…”.
- Navigate and select the image you want to use.
- Click “Open”. The image will now be displayed as an icon.
Company Guidelines
- Template Use Company Guidelines:Include instructions and links to resources on best practices and compliance for company users when using this template. This information will be visible to the user before starting the provisioning request.
Once all settings have been configured click “Next” at the top of the page.
Provisioning Settings
The second section relates to the governance settings for the Template. This section is broken down into 7 sections; “Security, Policies, Channels, Apps, Team Settings, Metadata, and Consent”.
Security
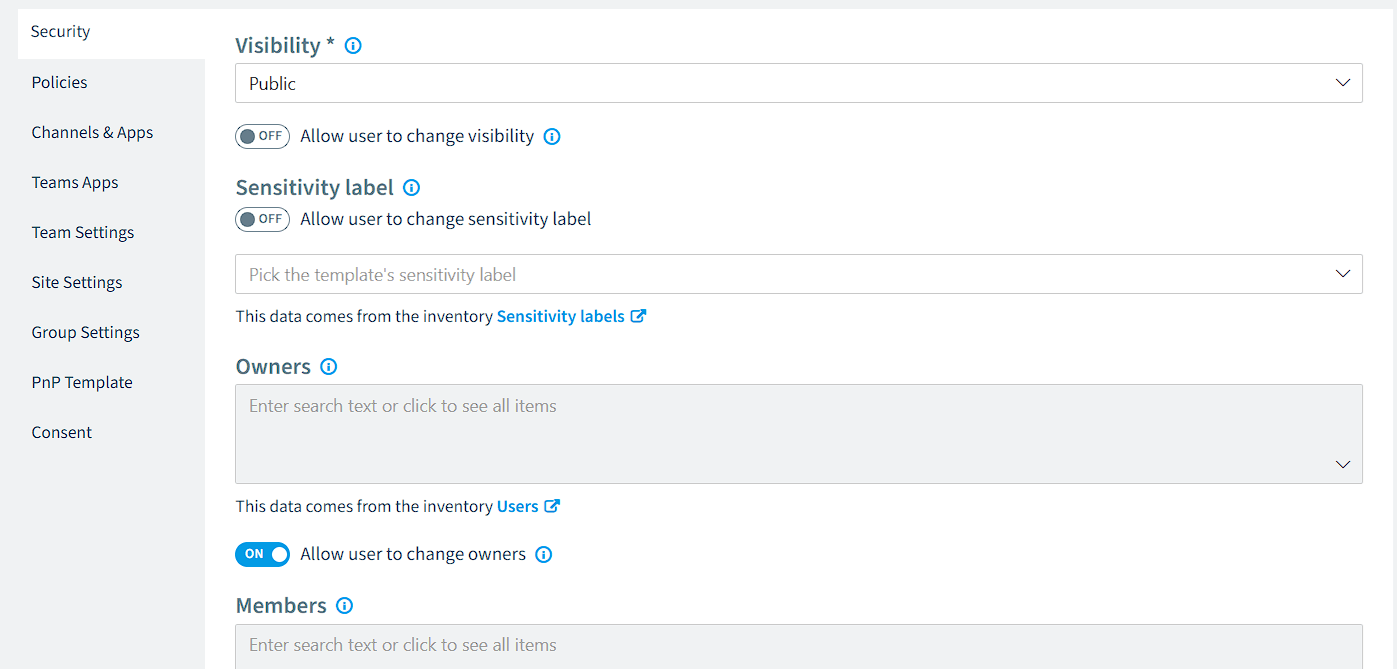
The security tab allows you to set the visibility of the team and assign a sensitivity label.
-
Visibility: Select whether or not the team is Public or Private.
-
Sensitivity Label: Type the Sensitivity label you want to use or select one from the drop.
Note: The sensitivity labels come from your tenant which has been scanned into Rencore Governance.- Permit whether you want to allow the requester to change the sensitivity label.
-
Owners: Predefine the owners for the Template.
- Permit whether you want to allow the requester to change the Owners.
-
Members: Predefine the members for the Template.
- Permit whether you want to allow the requester to change the Members.
Policies
They are enforced during the creation of the team. These can be altered after the Team has been created.
-
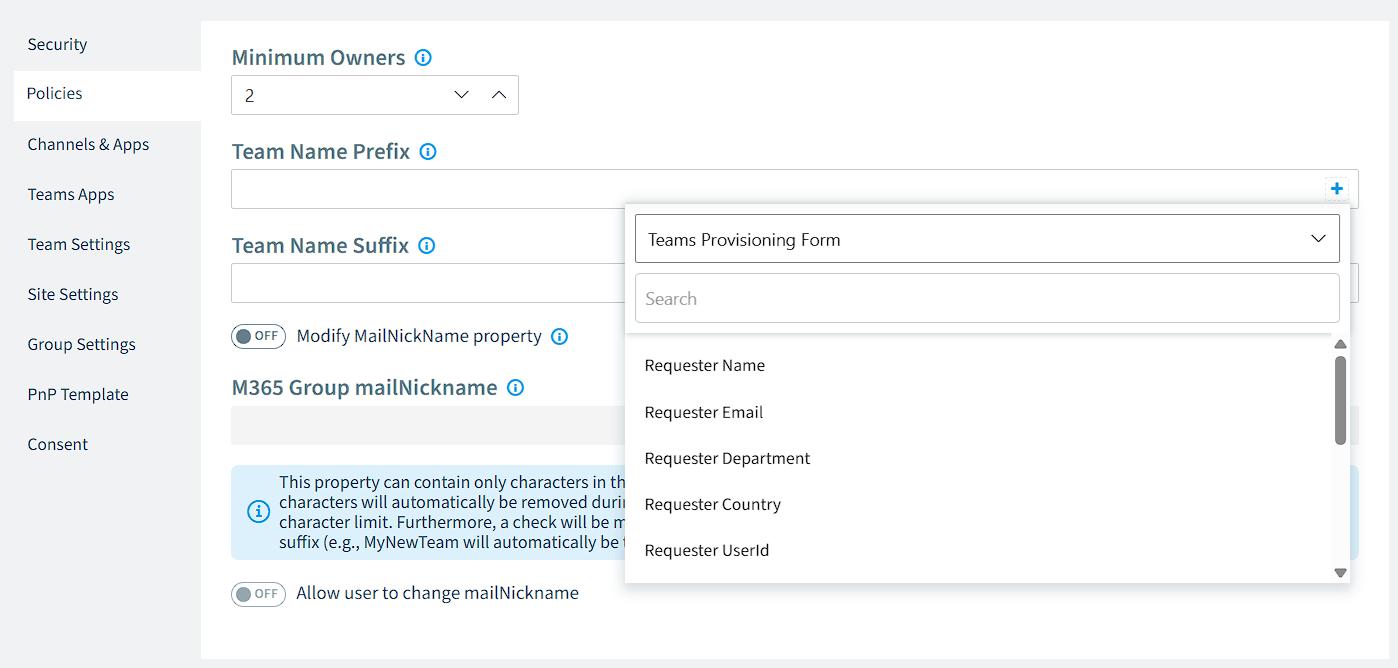
Minimum Owners: Define the minimum number of owners that the user must enter when provisioning the Team.
-
Team Name Prefix: Specify a Prefix that is assigned to the team’s name. Either use free text or select a Data Place Holder.
-
Team Name Suffix: Specify a suffix that is assigned to the team’s name. As with Team Name Prefix, either use free text or select a Data Place Holder.
-
Modify the MailNickName Property
- If you want to change the mailNickname property, enter this in the “M365 Group mailNickname” value.
- Also, decide whether you want the request to be able to change this during the provisioning request.
Channels & Apps
Allows you to add defined channels to the Team during provisioning.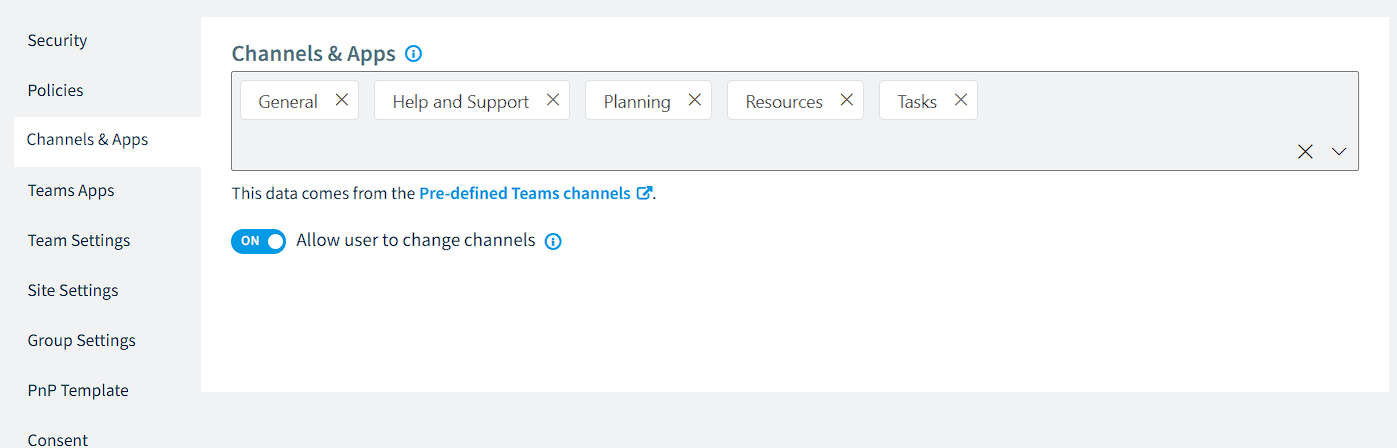
-
Channels: Click on the box and type the name of the channel you want to add.
To know what Channels are available or to add more, click "Pre-defined Teams channels" below the Channels box.- Permit whether the requester is allowed to change the Channels once created.
Teams Apps
Allows you to choose which apps will be installed for users when creating your Team.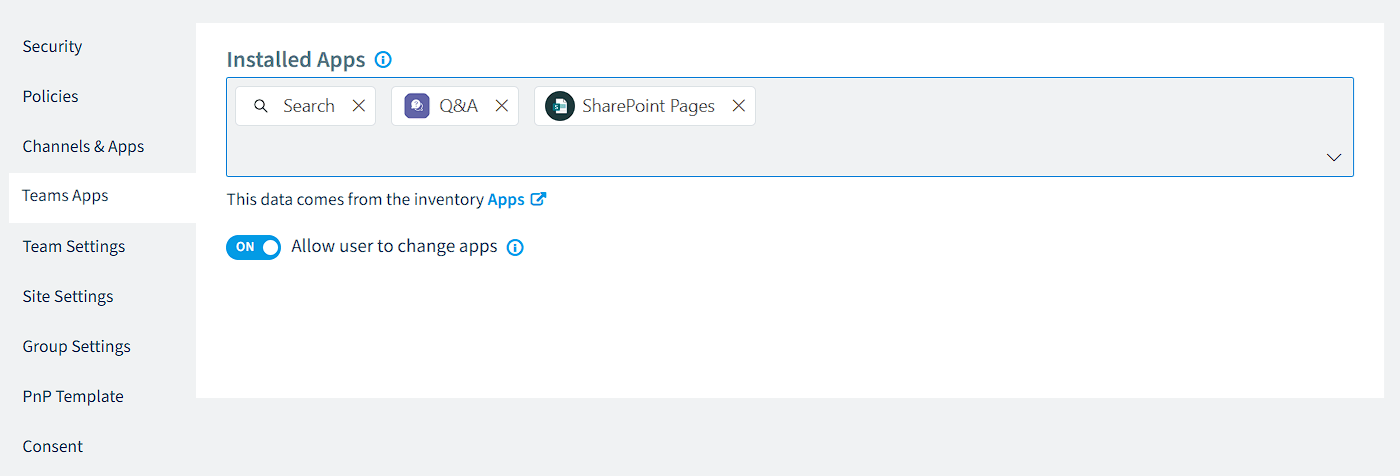
-
Installed Apps: Click on the box area and type the name of the app you want to install.
Note: The apps come from your tenant, which has been scanned into Rencore Governance.- Permit whether the requester can change the apps once the Team is created.
Team Settings
Allows you to define which Team Settings are enabled for members and guests.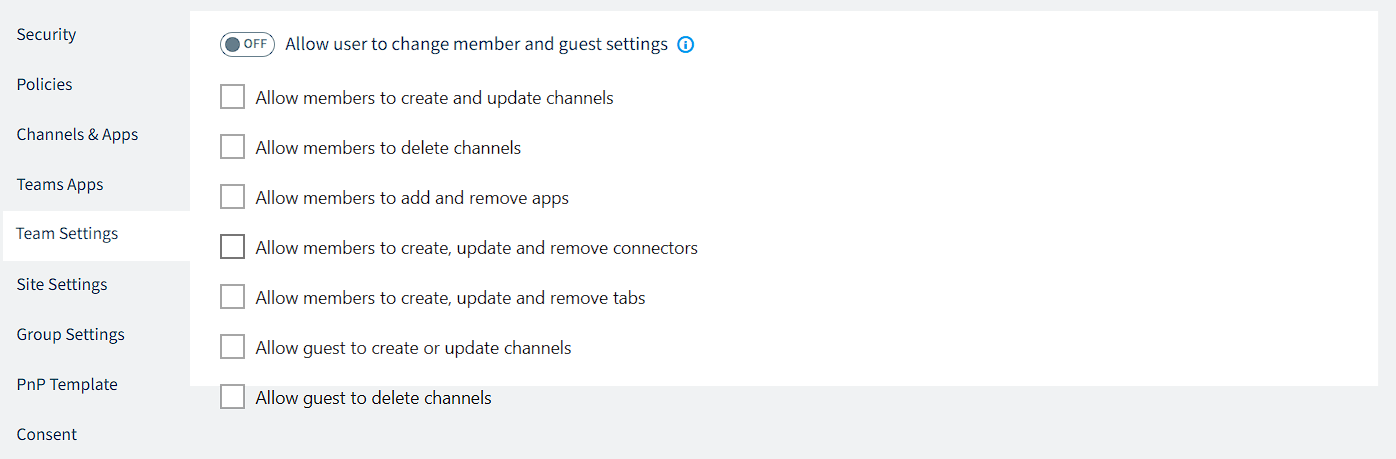
-
Check the boxes for the settings you want to be permitted in Teams.
- Permit whether the requester can change the settings during the provisioning request.
Site Settings
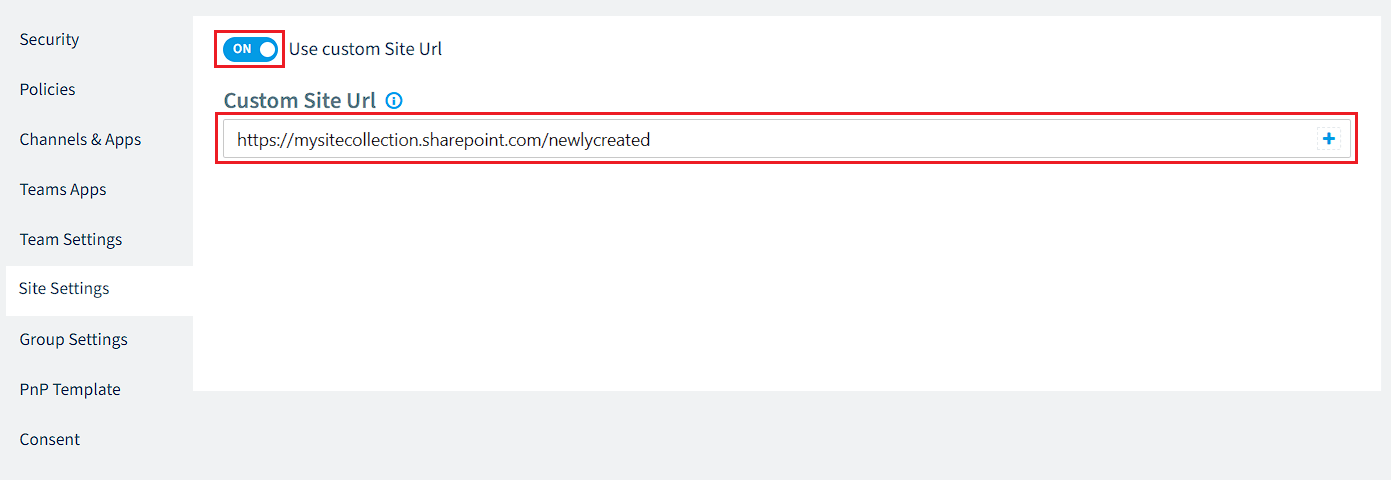
Allows you to define a custom Site URL for the Provisioned object.
To add a custom site URL
- Enable the toggle to “On” for “Use custom Site Url”.
- In the “Custom Site Url” field, enter the desired “URL”.
Group Settings
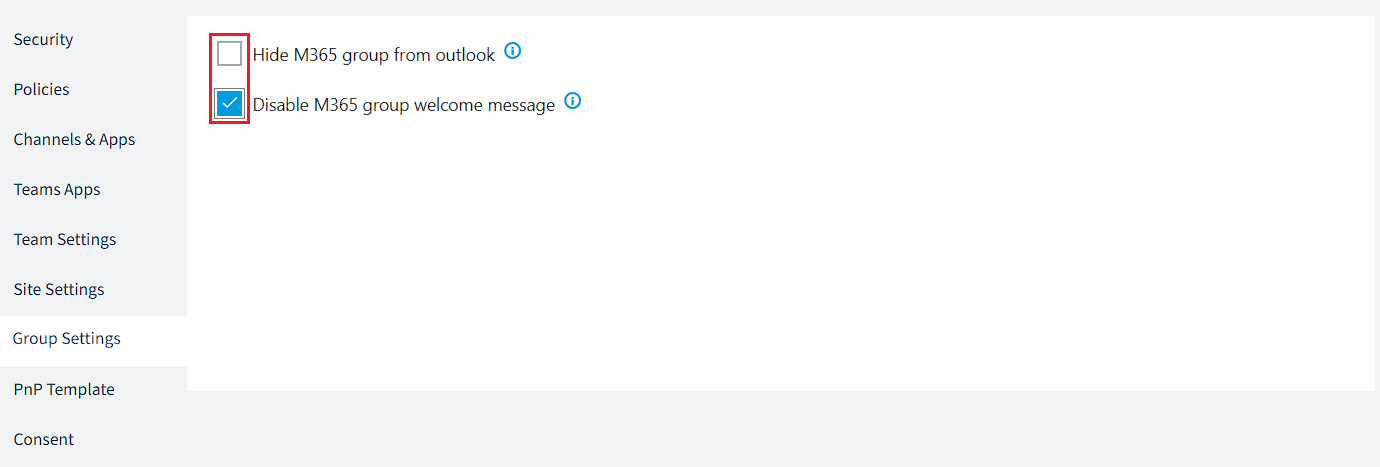
Allows you to either hide the M365 group from Outlook or Disable the M365 group welcome message. To select either of these settings, click on the relevant box.
PnP Template
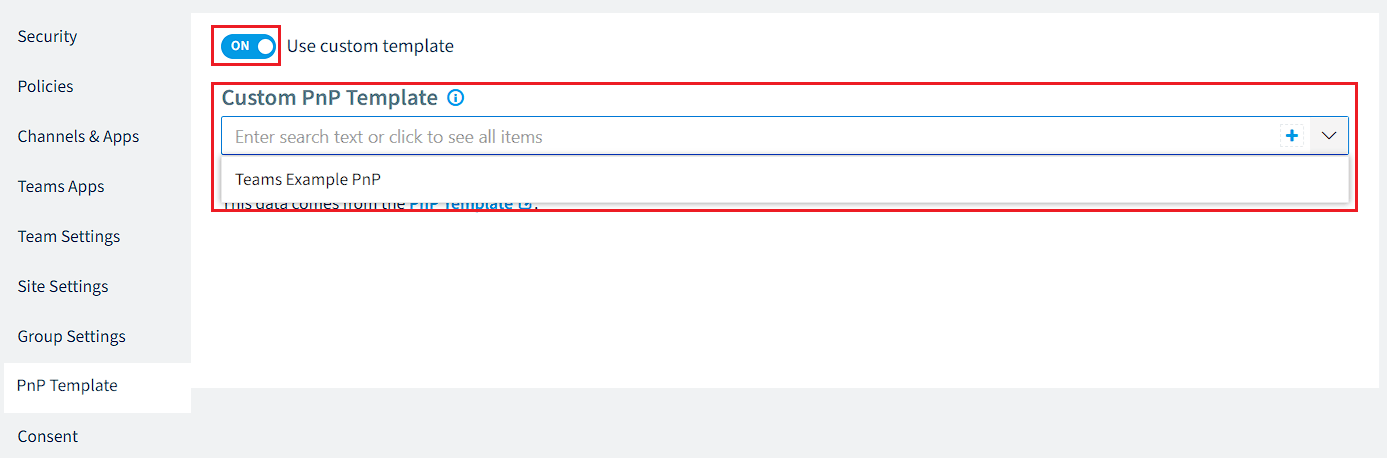
With PnP templates, you can build upon your existing provisioning template and use PnP templates as XML files to further improve and customize your provisioning experience.
To use a PnP template:
- Enable “Use custom template” to “On”.
- Select a template you want to use.
- Learn more about our PnP integration and how to use it here.
Consent
Rencore Governance needs permissions for your Microsoft 365 tenant in order to create the teams. This will be required only on the first use of the feature. This needs to be an administrator on the tenant who has permission to grant the following permissions:
- Read and write all groups.
- Read all users’ full profiles.
- Have full control of all site collections.
- Have full control of all site collections.
Approvals
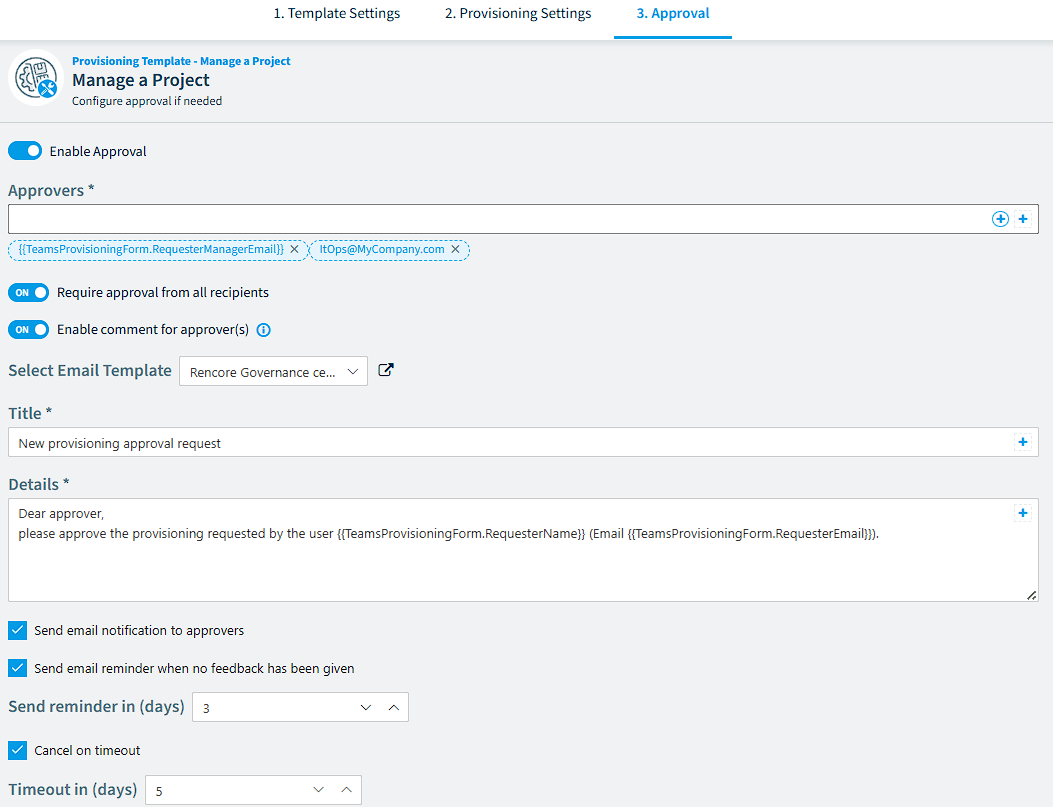
This section allows you to enable approvals for the team template. So, someone will need to approve it before the Teams creation.
-
In order to enable Approvals for Team creation, you will need to toggle the option at the top of the page.
-
Approvers: Either enter the email address of the Users who can approve the Team creation. Alternatively, you can use a data placeholder using the selection on the right of the box.
-
Toggle whether you want approval from all the Approvers entered above, or whether just one approval is required.
-
Toggle whether a Comment is required from the approver(s).
-
Title: Provide a subject for the approval email that will be sent to the approvers.
-
Details: Enter the body block of the approval email, which will be sent to the approvers.
Tip: When structuring the email the "Title" and "Details" can use data placeholders to provide additional information for the approvers. -
Toggle whether or not the email is sent to the approvers.
-
Toggle whether a reminder is sent if the approval is not granted.
-
Send reminder in (days): Enter the number of days that you want a reminder to be sent to approvals if no action has been taken.
-
Timeout in (days): Enter the number of days that you want the provision request to timeout. When “Cancel on timeout” is enabled.
Once all settings have been configured for the Team Provisioning template, click “Done” at the top right of the screen.
Completion
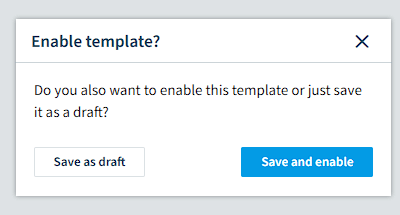
A prompt will appear asking “Do you also want to enable this template or just save it as a draft?”, if you want to enable it straight away click the “Save and enable” button. If you just want to save it without enabling then click the “Save as draft” button.
After selecting an option, you will be loaded into the “Provisioning Template Instances” screen.