Guide
Add a Virtual Environment
Tenant segmentation (Virtual Environments) in Rencore Governance allows you to logically group data within a Microsoft 365 tenant to apply targeted policies and reporting to specific departments, regions, or projects. Tenant Segmentation is possible to have the following settings to be applied independently from the root environment:
- Permissions
- Appearance
- Managed Services
To add a Tenant Segmentation to your Workspace, you will need to:
-
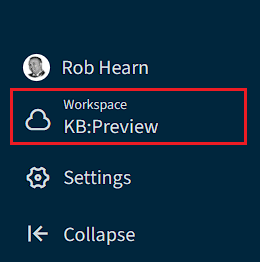
On the Nav Panel, select the desired Environment using the “Workspace & Environment Selector”
.
-
Click “Settings”.
- Click “Environment Settings”.
- Click “Virtual Environment”.
-
Click on “Add Virtual Environment” to create the Tenant Segmentation, which can be broken down into five stages, as follows:
Data and Filters
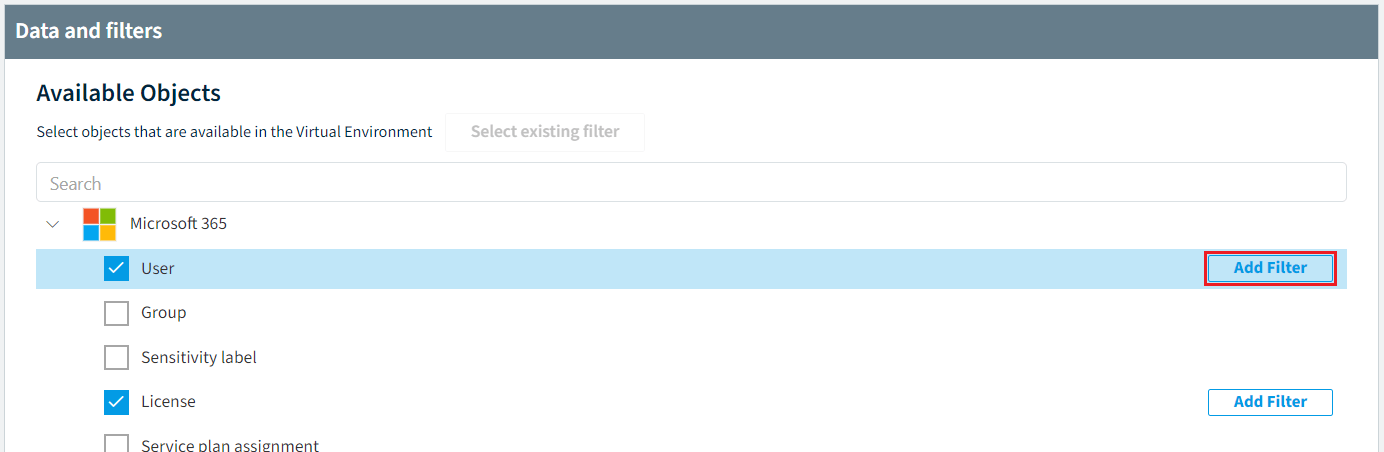
Go down the list and select the objects available in the Tenant Segmentation.
-
After selecting the desired objects, click on “Add Filter” next to each selected object.
-
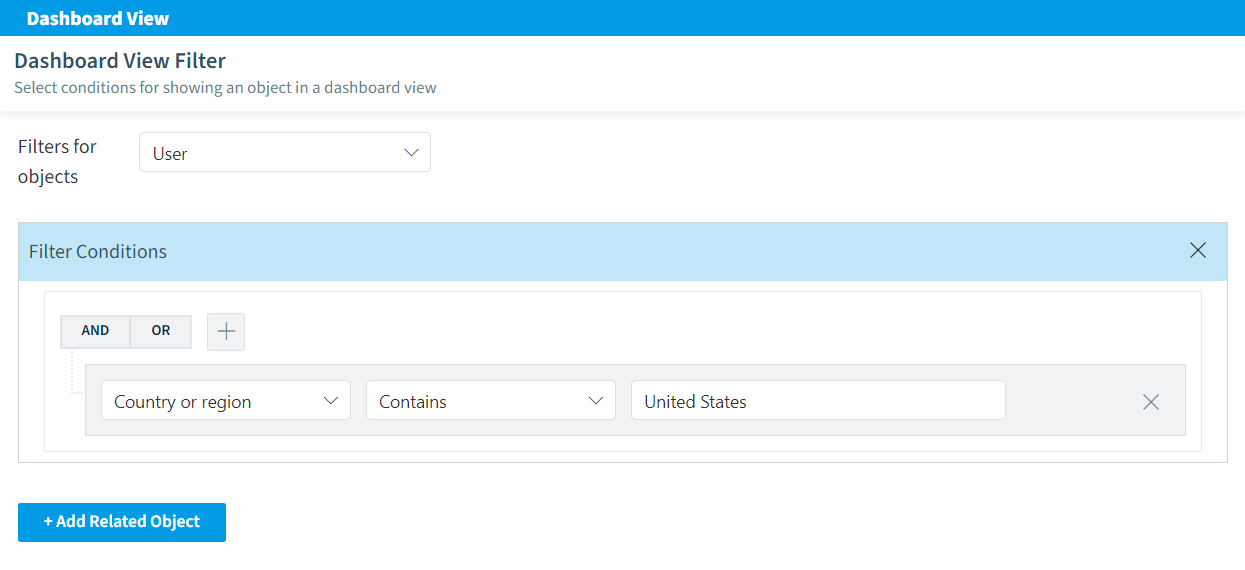
Enter the logic for the filter (e.g. All users that are based in the USA), once the logic is entered click “Set filters” at the bottom of the page.
-
Repeat this for all the objects selected and click “Next” in the top-right of the screen.
Dashboards
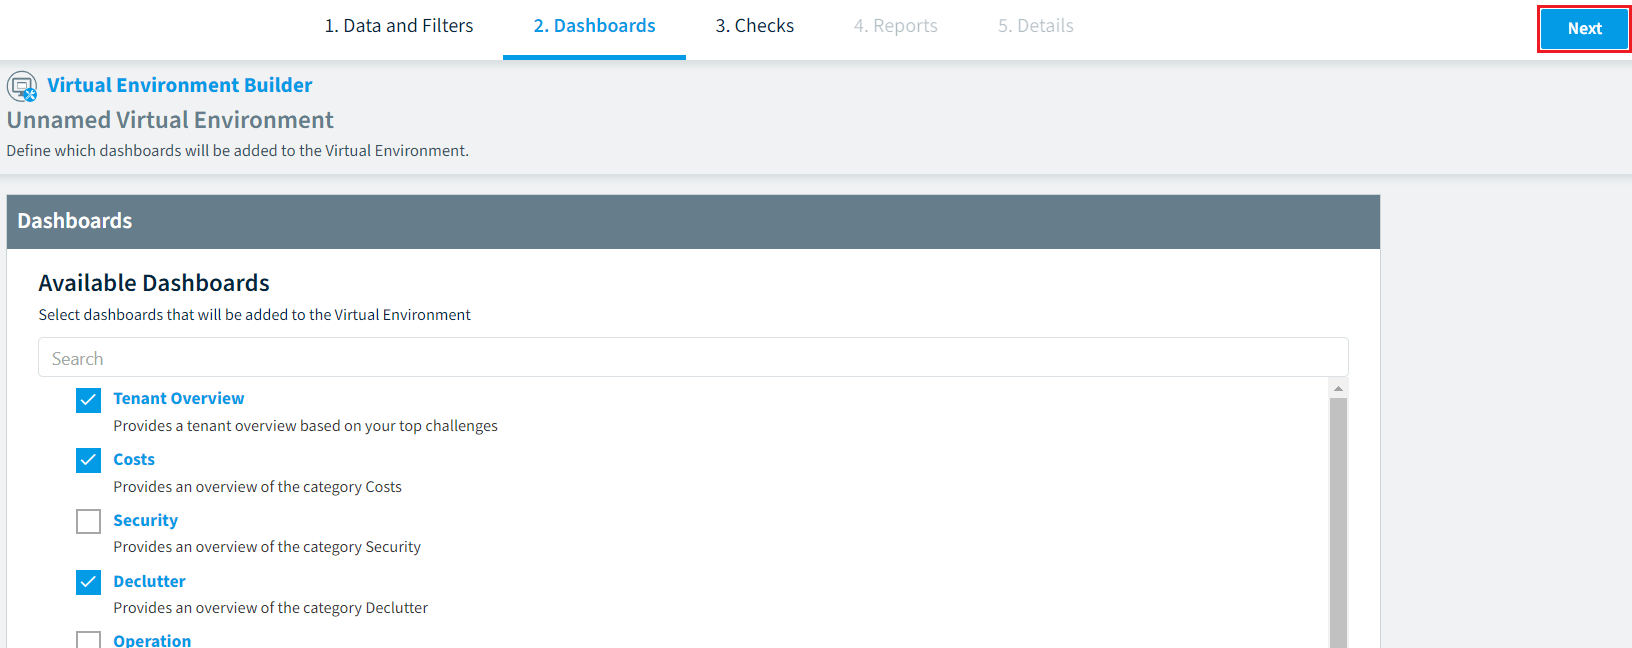
- On the Dashboards step, select all the Dashboards that you want to be added to Tenant Segmentation.
- Once all of the Dashboards have been selected that you want to be included in the Tenant Segmentation click “Next” in the top-right of the screen.
Checks
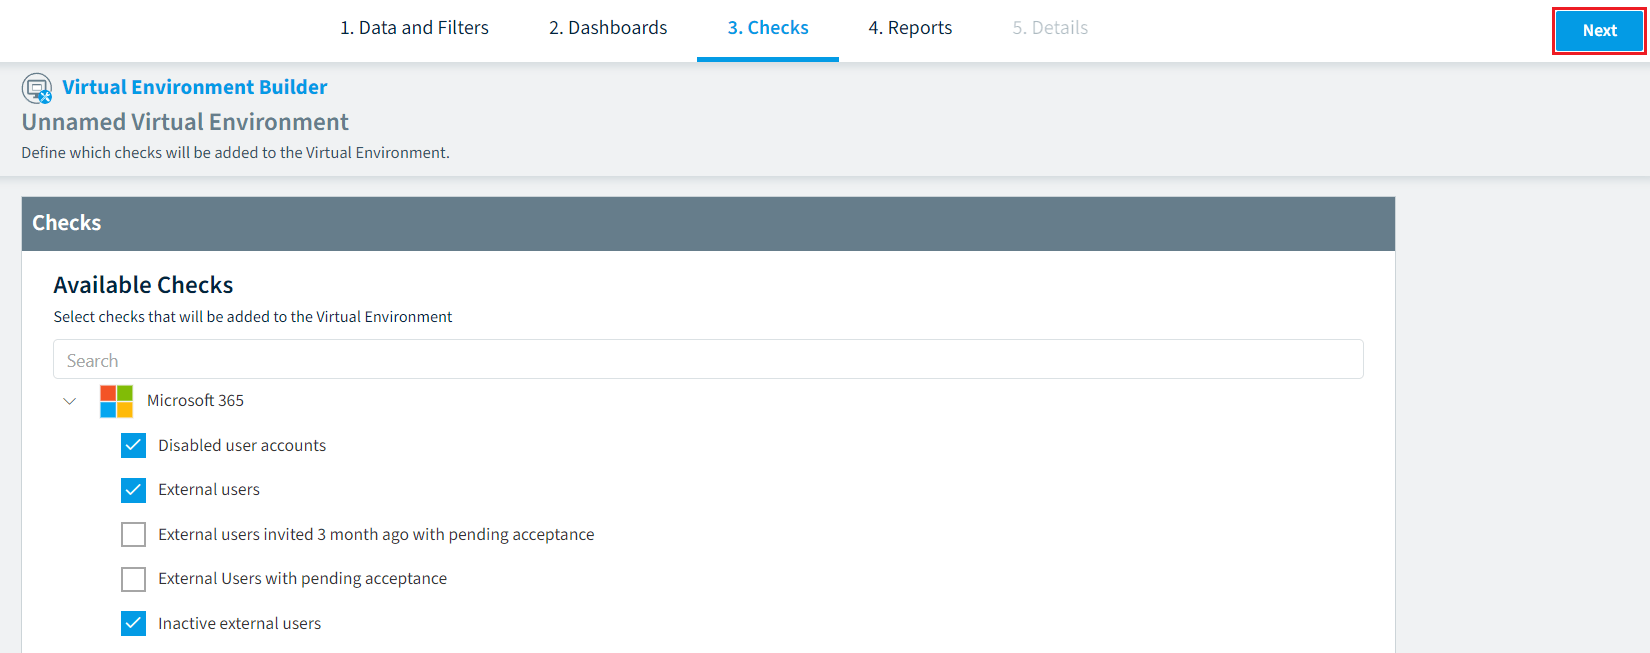
Define which Checks will be added to the Tenant Segmentation. As we narrowed the objects in the “Data and Filters” stage the checks available will reflect the objects selected.
- Go down the list selecting the Checks that you want to be added.
- Once all desired Checks have been selected click “Next” in the top-right of the screen.
Reports
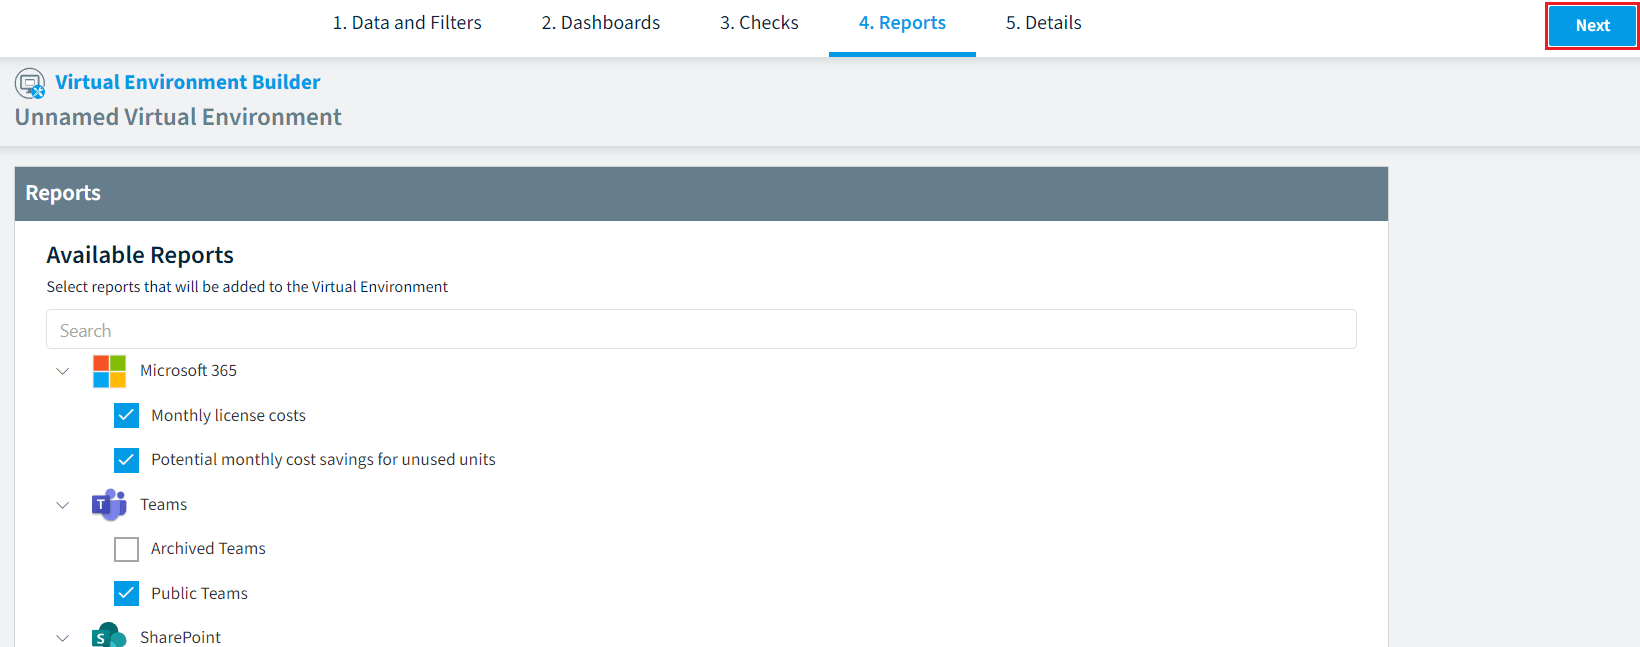
As with the previous step define the Reports that will be added to the Tenant Segmentation. Also as we had narrowed the objects in the “Data and Filters” stage the reports available will reflect the objects selected.
- Go down the list selecting the Reports that you want to be added.
- Once all desired Reports have been selected click “Next” in the top-right of the screen.
Details
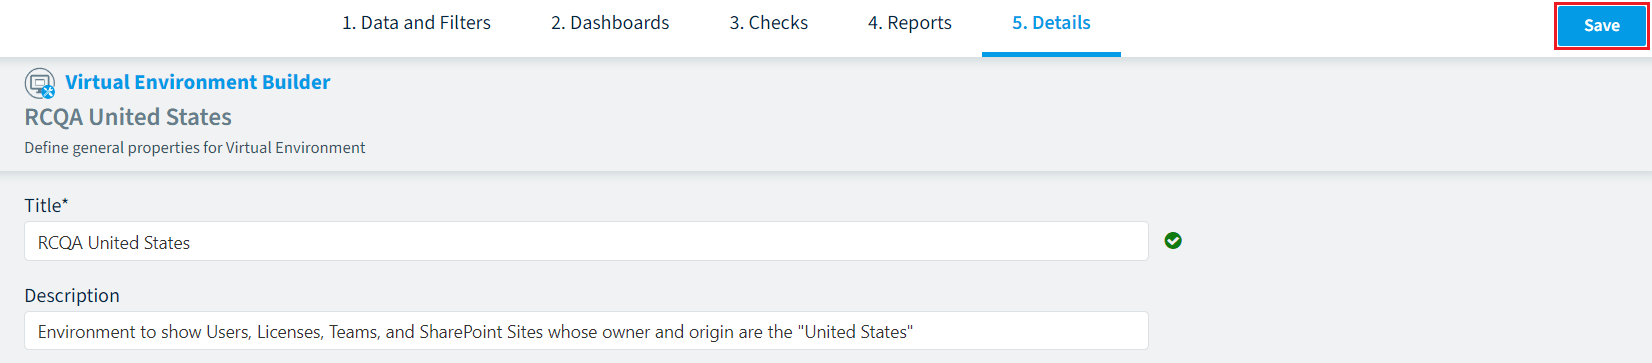
Define the general properties of the Tenant Segmentation.
- On “Title”, provide a name for the Tenant Segmentation (e.g. <Tenant> United States).
- On “Description”, provide a description for the tenant, this could include the filters used in the “Filters and Data” stage. (e.g. Environment to show Users, Licenses, Teams, and SharePoint Sites whose owner and origin are the “United States”).
- Once the fields have been completed click “Save” in the top-right of the screen.
Completion
Now that the configuration of the Tenant Segmentation is complete you will be returned to “Virtual Environments” in the “Environment Settings”. You will see the recently created Tenant Segmentation in the list, although it is currently being created.
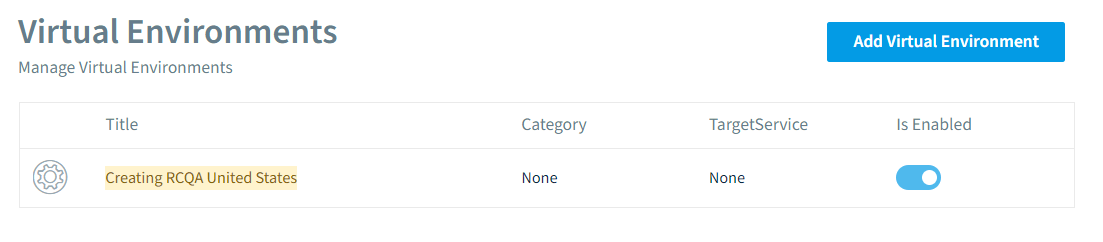
After the completion of the process, you will have the ability to access, modify, remove, or deactivate the Tenant Segmentation. This can be done through the “Ellipses Menu” located next to the Tenant Segmentation or by utilizing the toggle feature.