Reference
Copilot Studio Consent
Authentication for Copilot Studio in Rencore Governance works differently than for other services. Instead of an automated setup, the Entra ID application must be manually created within the specific tenant designated for scanning. This manual process ensures proper integration and allows Rencore Governance to access the necessary resources securely.
Enabling the Service
- Click on “Settings” and then”Environment Settings”.
- Click on “Manage Services”.
- Toggle the selector for “Copilot Studio”.
- Click “Save”.
Consent to the service.
Before you can provide consent for Copilot Studio, you will need to manually create an Entra ID application as detailed in the Knowledge base article: Dataverse and Copilot Studio.
Once you have set up the app and have the required details, you will need to:
-
Click on “Settings” and then “Environment Settings”.
-
On “General Setting_s”, click the ellipses menu (…)_ and select “Manage consent”.
-
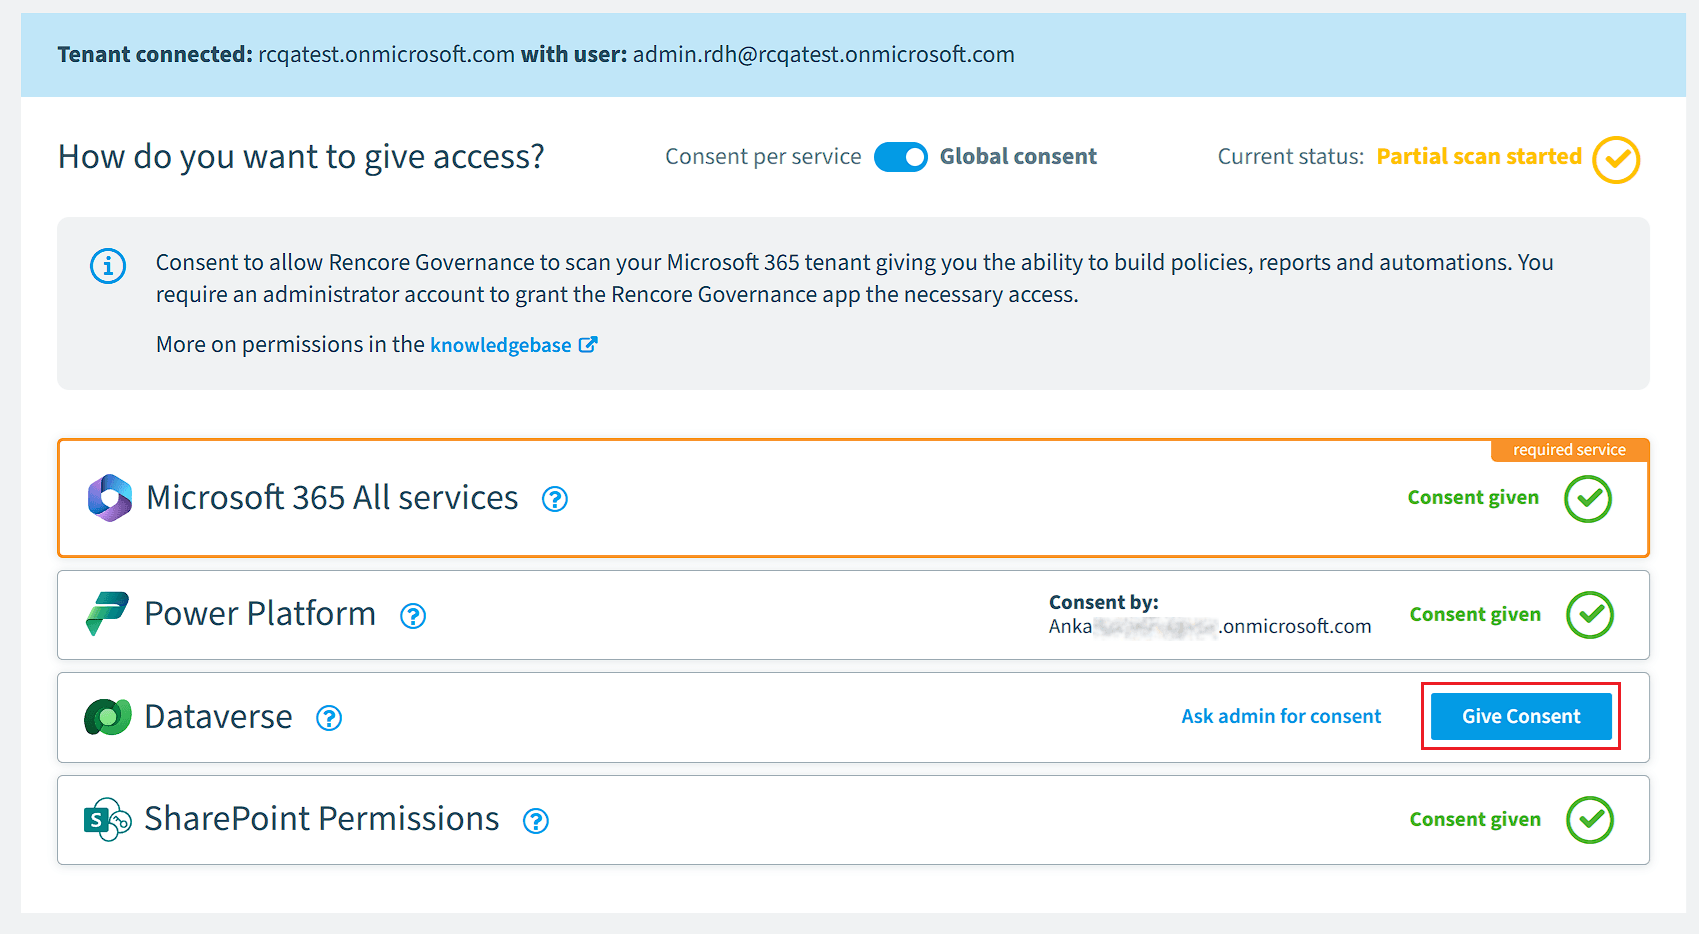
Click “Give Consent” on “Dataverse”
-
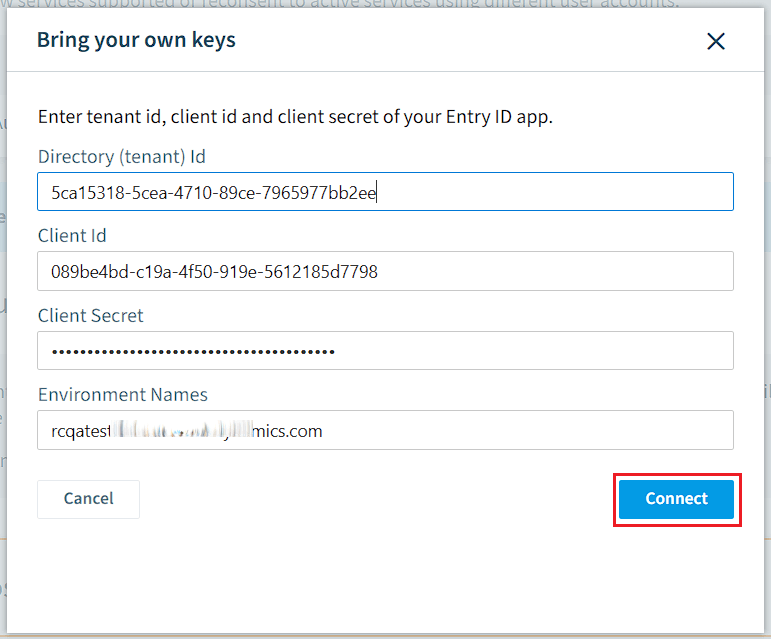
In the new Dialogue, enter the following details:
-
Directory (tenant) ID: Enter the tenant ID.
-
Client ID: Enter the application client’s ID.
-
Client Secret: Enter the Value that you copied when creating the Client Secret.
-
Environment Names: Enter the names (without the leading https:// if you copied the URL to the clipboard from the Environments Page) of the Environment(s) separated by a comma.
Tip: Make sure not to include any spaces in the Environment names, and do not include a space after the comma when adding multiple environments.
-
-
Click “Connect”.
-
After clicking “Connect”, you may be prompted that the consent was partial
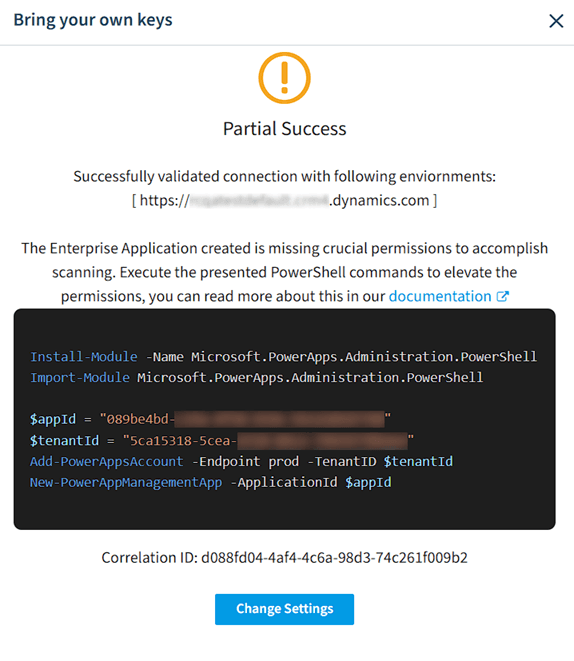
You may then need to run a PowerShell script to add crucial permissions to the app. -
The PowerShell script will include your Tenant ID and App ID.
- Copy and execute the PowerShell script.
- Sign in with your Global Admin account.
- After execution, return to Rencore Governance and click “Change Settings”.
- Click “Connect”.
-
-
Provided all settings are correct, a confirmation dialog will state that the connection was successful.
-
Click “Save and Close”.
-
Consent will be given.
 Note: Most Copilot Studio inventories are retrieved via the Copilot Studio scan. However, Daily Costs is the only exception - this data is retrieved via the Azure scan. To see Daily Costs data, Azure consent must also be granted, and the Reader role must be assigned to the relevant Azure subscriptions.
-