Guide
Create a Automation Summarized by Policy
To create an Automation summarized by policy, you will need to create an automation in the usual fashion, as detailed in “Create an Automation from a Template” or “Create a Custom Automation”.
-
The Trigger needs to be triggered by “On policy violation” or “On scheduled”, set to On Policy Violation.
- The Policy that you set needs to have been set to be summarized by a related object, as detailed here.
-
The system will be flagged that the policy is summarized.
-
Add the actions that you want.
-
To use the summarization, click the ”+” within a field in the action.
-
Click on the Object and scroll down to the bottom and select “
<Object>> Policy<Related Object>”.Info: Remember the summarisation will be on the object of the policy, not on the summariser by the related object. The placeholders will be based on the properties of the policy object. In the example, the place holders will be based on the Team. The naming for the object is based on the summarised related object, so again, in the example below, it would be the Owners.
For Example
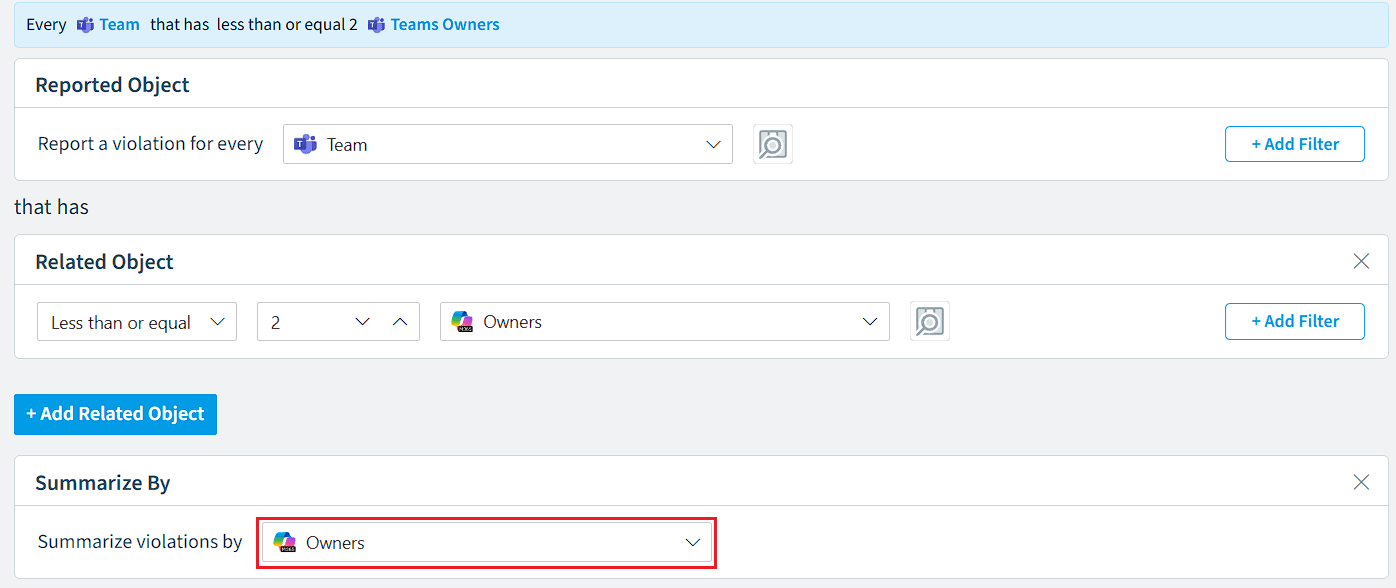
An automation that sends an email to Team Owners to inform them of all the teams that they are an owner which have only 2 owners or less.
-
Create a Policy “Teams with very few owners”.
-
Summarize the policy by the Owners.
-
Save the policy.
-
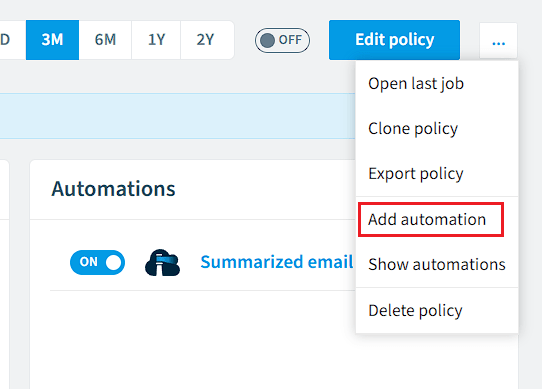
On the Policy details page, click the ellipses and click “Add automation”.
-
Click ”+” to add an action and select “Send email”.
-
In the email action:
-
On “To *” press ”+” and select the “User Email” under “User”.
-
Add a Subject in the “Subject *”.
-
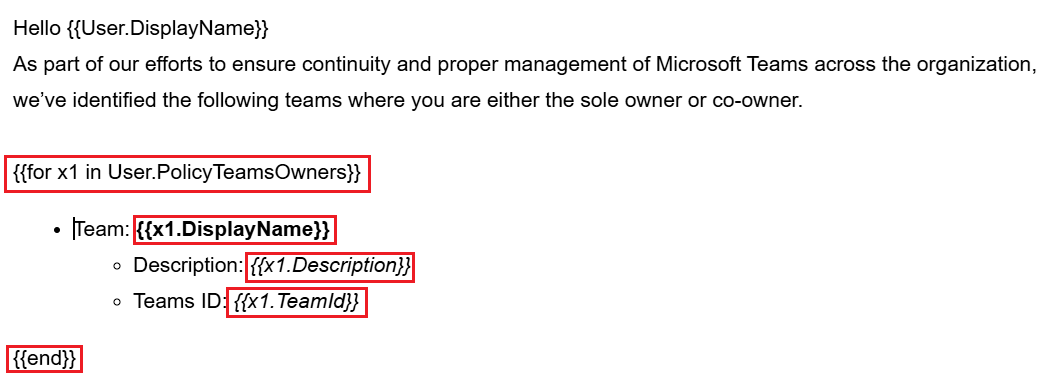
In the “Body *”, enter the message to the team owner. To add placeholder elements from the summarized policy, click on the ”+”, click on the object and scroll down to the bottom and select “User > Policy Teams Owners”.
-
This will show the placeholders/properties of the Object from the Report. (This will add a {{for x1 in User.PolicyTeamsOwners}} {{x1.
<element>}}{{end}} tokens). -
Repeat for all the details you want to enter, making sure to keep the additional properties between the opening and closing tokens.
Click “Save”. -
Click “Next”.
-
On the “Details” page, complete the fields as normal and click “Done”.