Guide
Invite Users to a Workspace
This process can only be performed by either the owner or admin of the workspace.
To add a user to your workspace, you will need to:
-
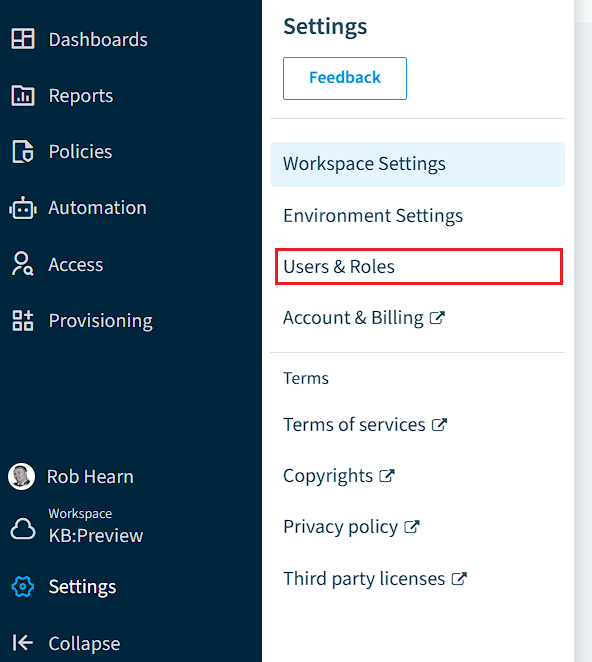
Click on “Settings”.
-
Click on “Users & Roles”.
-
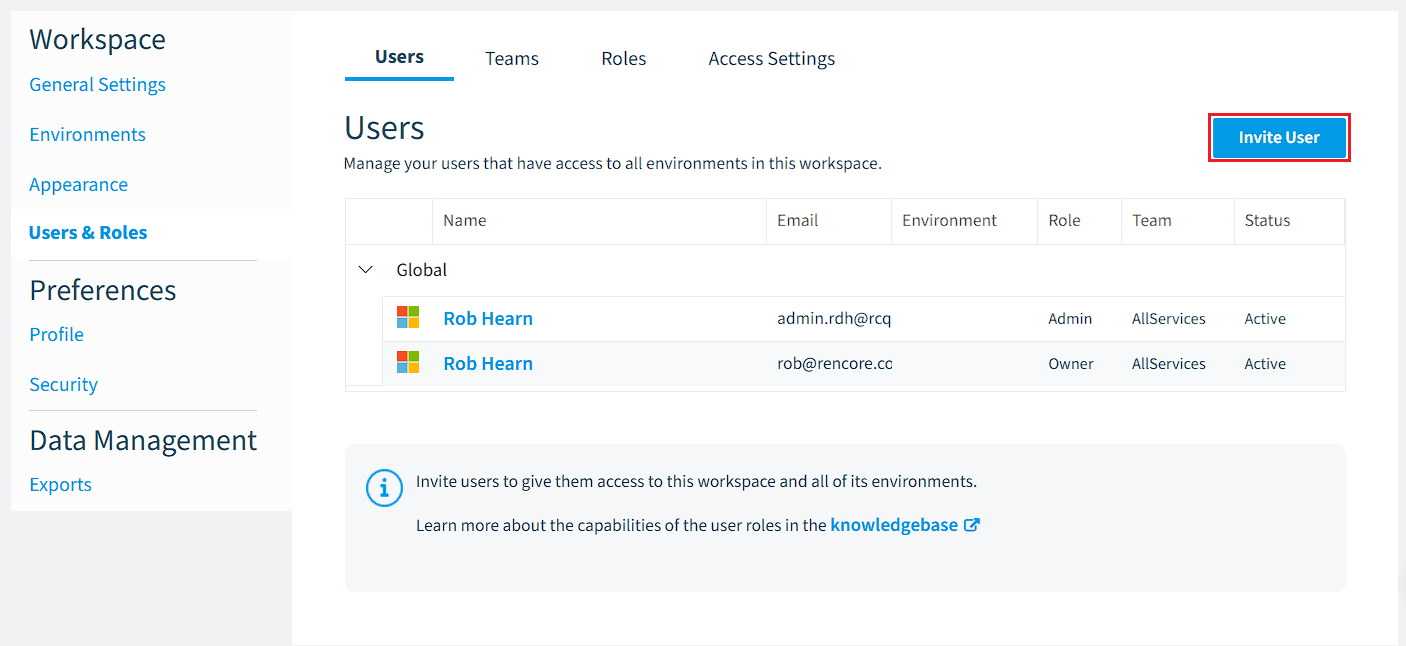
Click the “Invite User” button in the top-right corner.
-
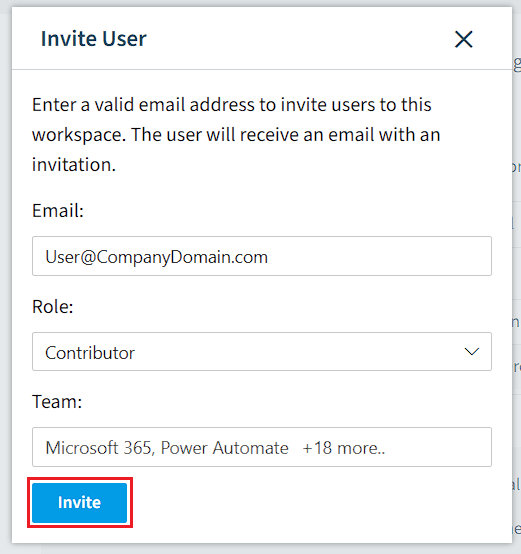
Enter the email address of the user you want to invite to your workspace.
-
Select what role you want that user to be:
- Owner: There should only be one owner, and that is the first person to create the workspace.
- Admin: This user has the same rights as the owner, where they can add and remove environments, Workspaces, Dashboards, and Users.
- Contributor: This user can work with data, creating dashboards, checks, inventories, etc.
- Reader: This user can only read the data granted to them.
- Custom Role: A Role that has been created by a Workspace Administrator or Owner.
-
Select what team(s) you want that user to be in:
- All Services: This team has access to the entities for all services.
- Microsoft 365: This team has access to the entities for the service Microsoft 365.
- Power Automate: This team has access to the entities for the service Power Automate and includes Users and Groups from Microsoft 365.
- Power Apps: This team has access to the entities for the service Power Apps and includes Users and Groups from Microsoft 365.
- SharePoint: This team has access to the entities for the service SharePoint and includes Users and Groups from Microsoft 365.
- OneDrive: This team has access to the entities for the service OneDrive and includes Users and Groups from Microsoft 365.
- Entra ID: This team has access to the entities for the service Entra ID and includes all entities for the Microsoft 365 service.
- Teams: This team has access to the entities for the service Teams and includes Users and Groups from Microsoft 365.
- Viva Engage: This team has access to entities for the service Viva Engage.
- Exchange: This team has access to entities for the service Exchange.
-
Click “Invite” and they will receive an email inviting them to the workspace in Rencore Governance.