Guide
Provision of a New Demo Environment
As the data in a demo environment is not updated once provisioned, there is the ability to provision a new demo environment with fresh demo data. Doing this will also include any new dashboards, checks, segments, and automations.
In order to provision a new demo environment on your workspace, you will need to:
- Click on “Settings” on the Nav Panel.
- Click “Workspace Settings”.
- Click on “Environments”.
- On the Environments screen, click the ellipses button_(**[…]**)_ and click “Add new demo environment”.
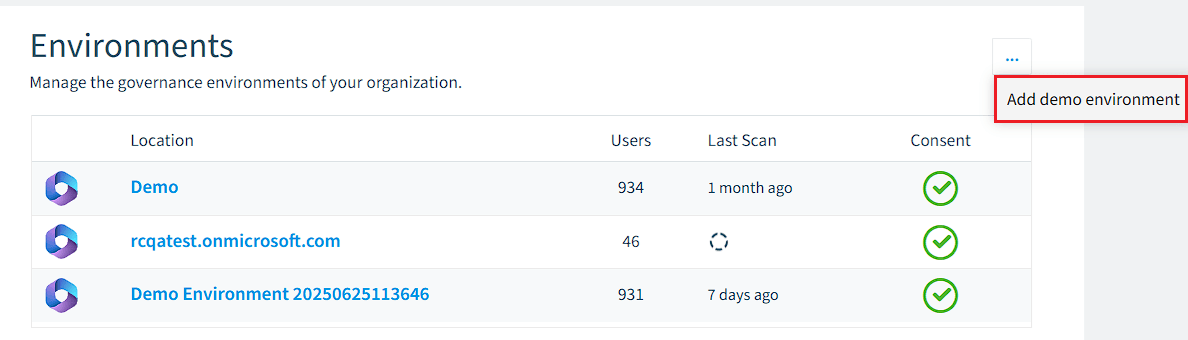
- After a few moments and refreshing the page will show the new demo environment labeled with a timestamp (e.g. Demo Environment 2025107031200).