Reference
Azure AD App Creation
Authentication for Azure in Rencore Governance operates differently from other services. Instead of an automated setup, the Entra ID application must be manually created within the specific tenant designated for scanning. This manual process ensures proper integration and allows Rencore Governance to access the necessary resources securely.
Create an Entra ID App
-
Go to the Microsoft Entra Admin Center.
-
In the left-hand navigation menu, under “Entra ID”.
-
Click on “Applications” and “App registrations”.
-
At the top of this page, click ”+ New registration”.
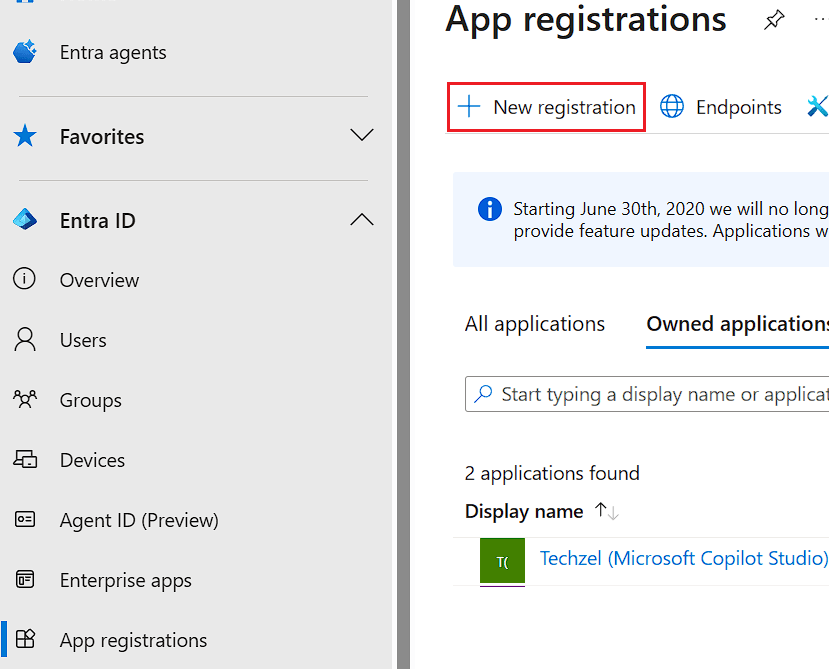
- In “Name”, enter “Azure Governance for Rencore”.
- For “Supported account types”, select “Accounts in this organizational directory only”.
- Click “Register”.
Create a Client Secret
Once the app is created under “Manage”.
-
Click on “Certificates & secrets”.
-
Select “Client secrets” and then click ”+ New client secret”.
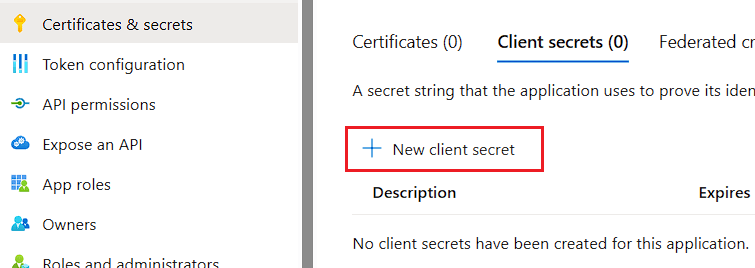
- In the Description, enter something like “RencoreGovernance_Azure2025”.
- Set “Expires” to “Recommended: 180 days (6 months)”.
- Click “Add”.
Tip: Copy the Value key immediately, as it will only be displayed once; you will need this later.
Set API Permissions
Again, under “Manage” in the “Azure Governance for Rencore” app.
-
Click on “API permission”.
-
Click ”+ Add a permission”.
- Select “Azure Service Management”.
- Select “Delegated permissions”.
- Select user_impersonation
- Click “Add permissions”.
Set Authentication
Once more, under “Manage” in the “Azure Governance for Rencore” app.
-
Click on “Authentication”.
-
Click “Add Redirect URI”.
-
Click “Web”.
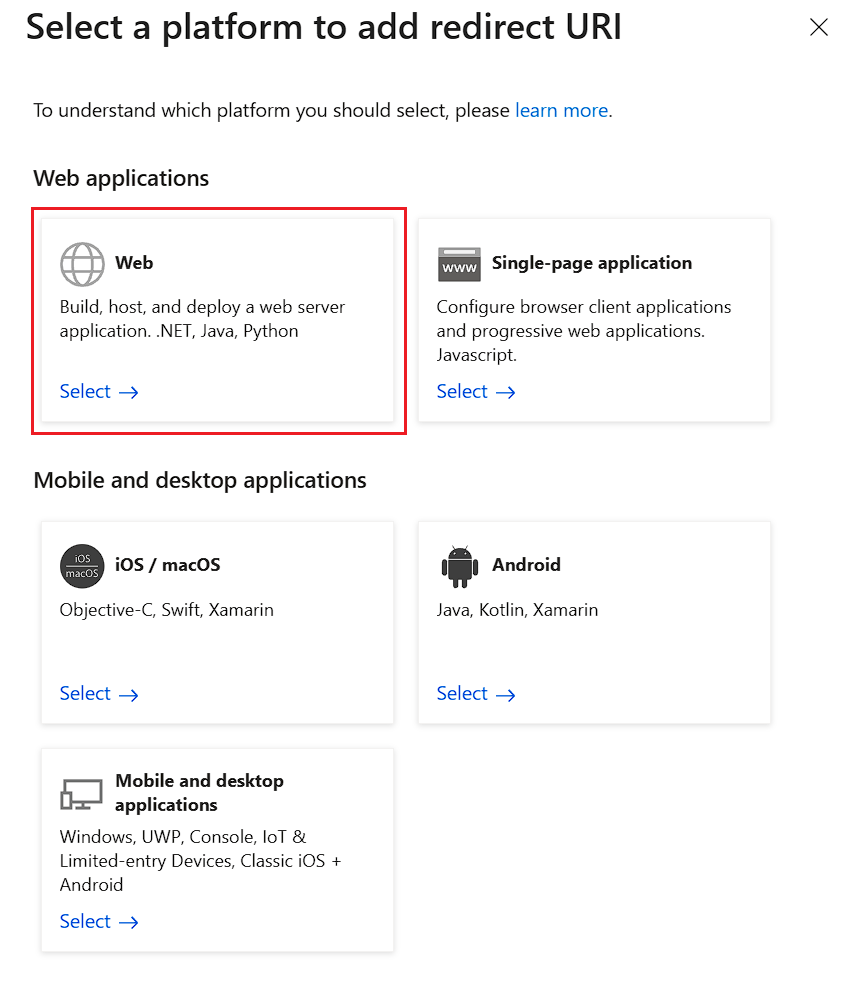
-
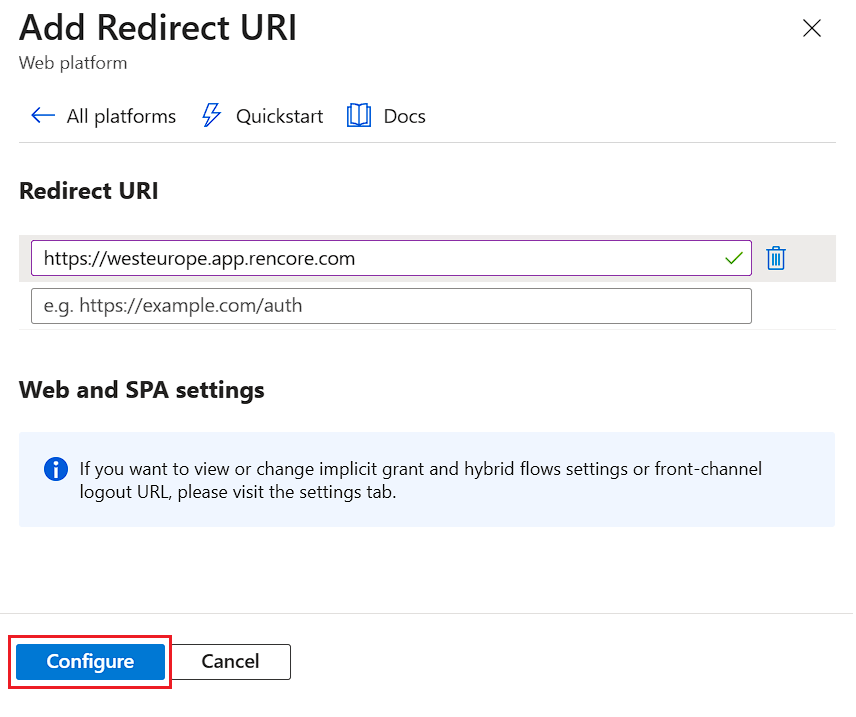
In “Redirect URI” enter “https://app.rencore.com”.
-
Click “Configure”.
-
Click on “Web” again.
-
Under “Redirect URI” enter the relevant URI below as per the Datacenter your workspace resides in.
-
Once the additional URI is entered, click “Configure”.
Assign App Reader Role
Subscription Level
Giving permissions per Subscription is the recommended approach to give better control over permissions for Rencore Governance.
To scan Subscription data, add your newly created app to the relevant subscriptions—either all or selected ones—and assign it the “Reader” role.
-
Open the Azure subscription that you wish to allow scanning in the Azure Portal
-
Click “Access Control ” in the left-hand menu.
-
Click “+Add”.
-
Then select “Role Assignment”.
-
Select “Reader” from the list of Roles,
- Click “Next”.
-
Click “Select members” and add the “**Azure Governance for Rencore” ** app created earlier as a member.
-
Click “Next” and “Review & Assign”.
Note : Granting the Reader role at the subscription level is required to retrieve Daily Costs data for Copilot Studio. Daily Costs is the only Copilot Studio inventory item scanned via Azure - all other Copilot Studio inventory is retrieved via Copilot Studio scan. Without his step, Daily Costs will show no data.
Management Group Level
Assigning permissions at the Group level widens the scope of restrictions in Rencore Governance. These permissions must be applied individually to each Group, or at the Tenant Group level if you want them to apply across the entire tenant.
To scan Management Group data, add your newly created app to the relevant Groups, and assign it the “Reader” role.
-
Copy the name of the newly created app.
-
In the Azure Admin Portal, search for “Management groups”.
-
Click on the Required Group.
Tip: App permissions can be applied at the individual Group level or at the Tenant Group level. Setting them per Group limits governance to that group, while setting them at the Tenant Group level applies governance across the entire tenant. -
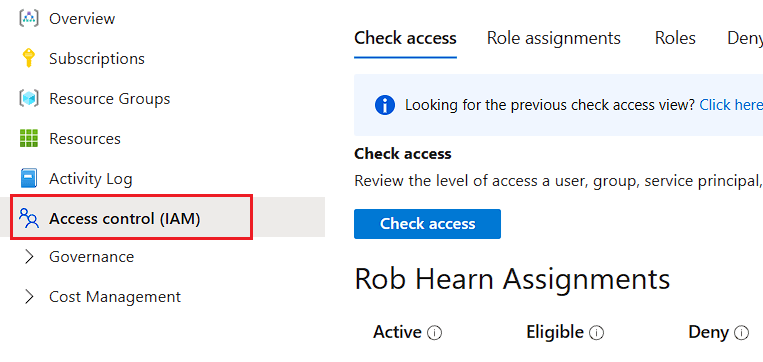
Click “Access control (IAM)”.
-
Click “+Add”.
-
Select “Reader” from the list of Roles,
- Click “Next”.
-
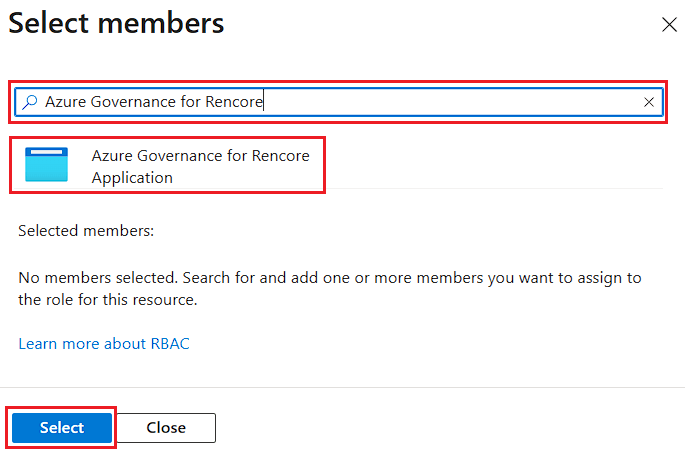
Click ”+ Select members” and paste the name of the app into the Search bar. Click on the App, then click “Select”.
-
Click “Next”,
-
Review the details and click “Next” and “Review & Assign”.
Repeat this to any additional Groups you want the app to access.