Guide
Start a Review
Starting a review
Click Review on a card to open the review start page.
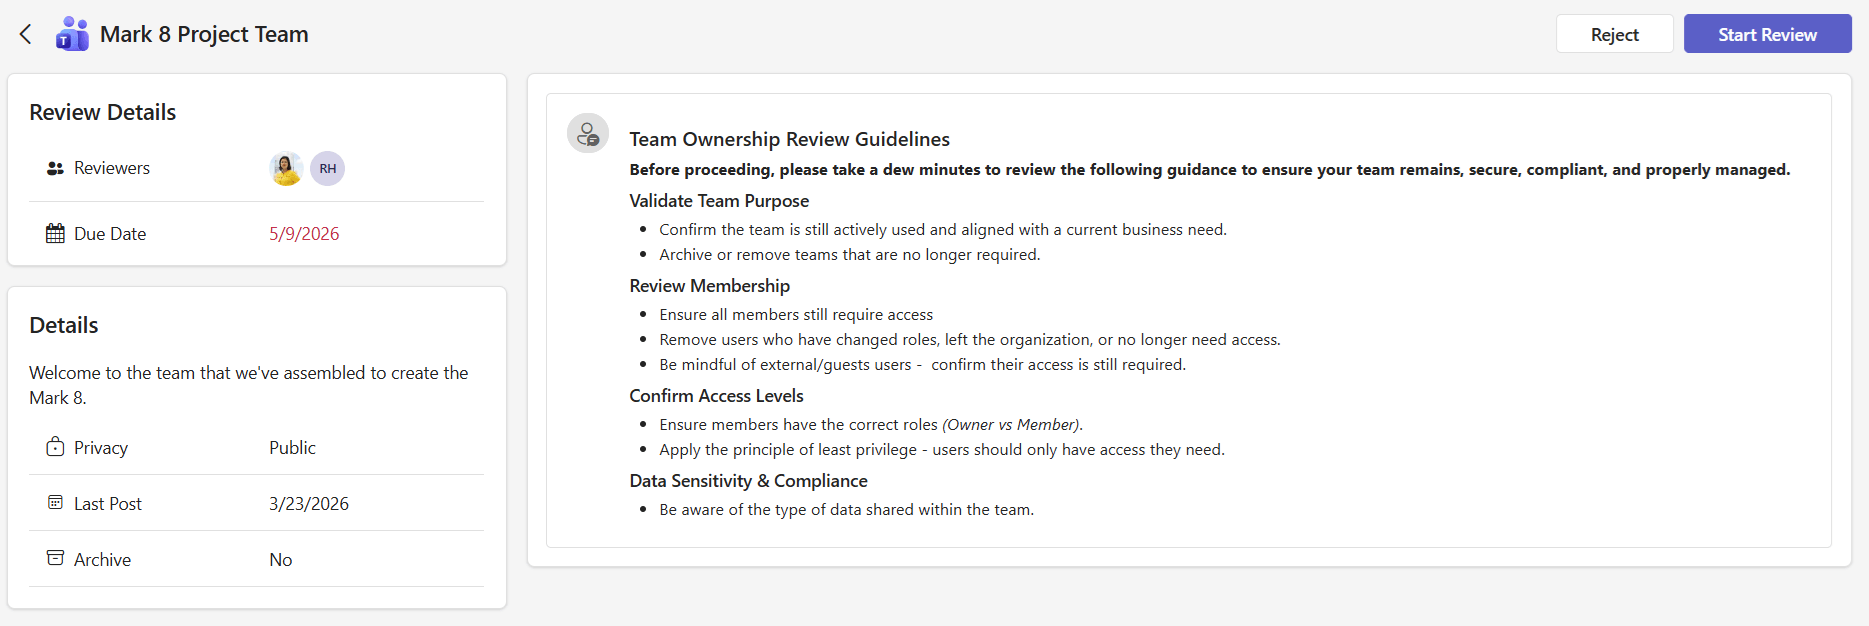
The start page shows:
- Review details - Assigned reviewers and due date
- Workspace details - Description, privacy setting, sensitivity label, and last activity date
- Company guidelines - Instructions from your admin about how to approach this review
If your admin has configured additional actions (like archiving or escalation), you will see a tip noting that these options are available on the final step.
The review process
Click Start Review to begin. The review is a guided, step-by-step process. A progress bar at the top shows which step you are on and how many remain.
The steps shown depend on the workspace type and your organization’s configuration. Your admin selects which steps to include for each review schedule.
Available review steps
Step | Available for | What you review |
|---|---|---|
Owners | Teams, SharePoint, M365 Groups, Viva Engage | People with owner-level access |
Members | Teams, SharePoint, M365 Groups, Viva Engage | People with member-level access |
Visitors | SharePoint | People with visitor-level access |
Site Access | SharePoint | Groups and users with site permissions |
File Access | Teams, SharePoint | Sharing links and direct file permissions |
You can navigate between steps using the Back and Next buttons. Changes you make are preserved as you move between steps - nothing is final until you complete the review.
You are not required to make changes on every step. If everything looks correct, simply click “Next” to proceed.
Reviewing owners
The Owners step lists everyone with owner access to the workspace.
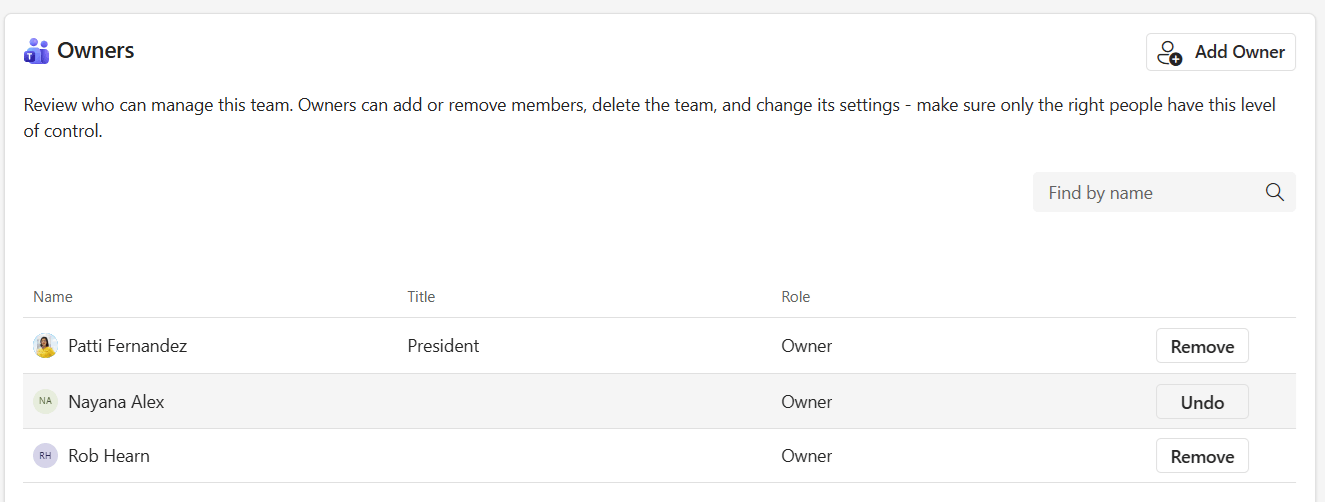
You can:
- Add an owner - Click “Add Owner” and search for a person.
- Remove an owner - Click Remove next to a person. They will be marked for removal with an option to “Undo” if you change your mind.
At least one owner must remain at all times. When only one owner is left, the remove and role change options are hidden.
Reviewing members
The Members step lists everyone with member access.
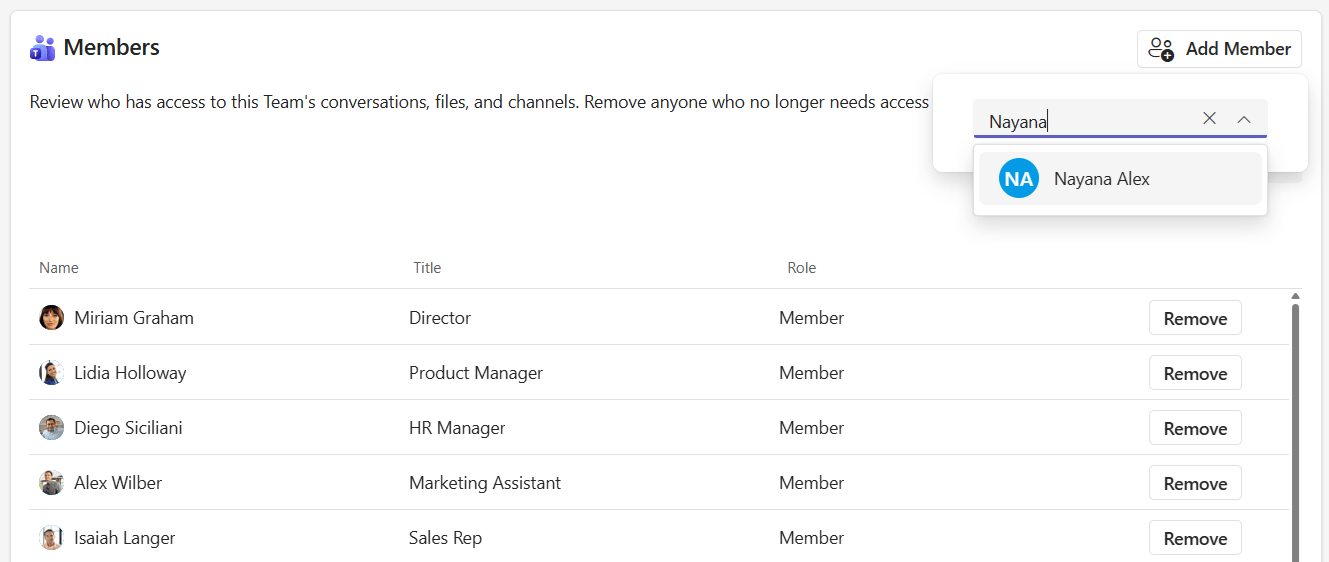
You can:
- Add a member - Click Add Member and search for a person.
- Remove a member - Click Remove to mark them for removal. They will be marked for removal with an option to “Undo” if you change your mind.
Guest users are shown with a distinct icon next to their name.
Reviewing visitors (SharePoint only)
The Visitors step lists users with visitor-level access to the SharePoint site. You can remove visitors, but cannot add new ones or change their role.
Reviewing site access (SharePoint only)
The Site Access step shows who has permissions to the SharePoint site, organized across three tabs:
- Groups - Entra ID and Microsoft 365 groups with access
- SharePoint Groups - Classic SharePoint groups (e.g., Site Members, Site Owners)
- Users - Individual users with direct site permissions
Use the filter pills to focus on specific access types:
- External - Users from outside your organization
- Organization-wide - Permissions shared with everyone in your org
- Internal - Standard internal users
Each filter shows a count of matching entries. Groups can be expanded to see their individual members. You can remove access at the group level.
Reviewing file access (Teams and SharePoint)
The File Access step shows how files and folders in the workspace are shared. The view is organized as a hierarchical tree:
- Files and folders - The shared item
- Sharing links or direct access - How it is shared (e.g., “Anyone with the link”, “Specific people”)
- Users within sharing links - Who has access through each link
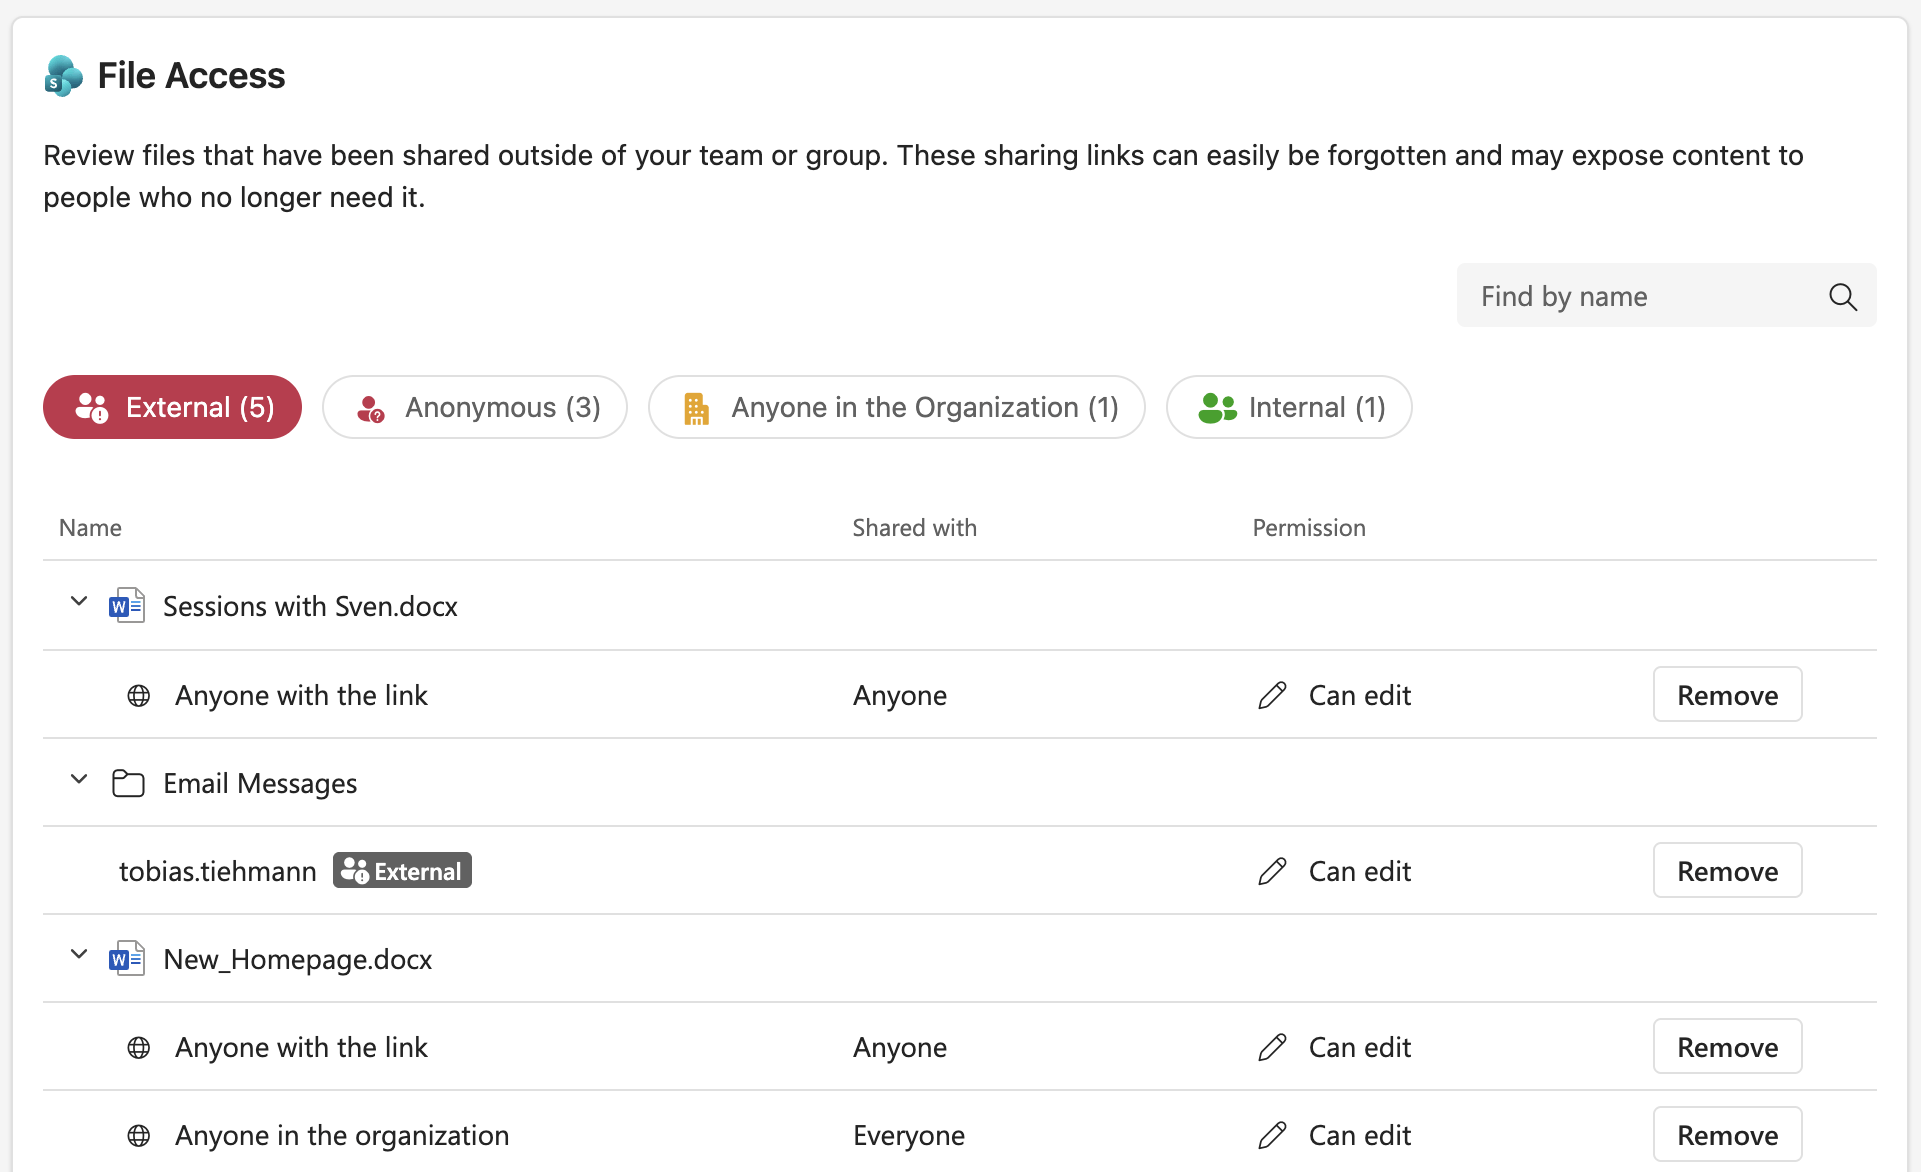
Use the filter pills to focus on specific sharing types:
- External - Shared with people outside your organization
- Anonymous - Anyone-links without a sign-in requirement
- Anyone in the Organization - Org-wide sharing links
- Internal - Shared with specific internal users
To remove a sharing link, click “Remove” next to it. This removes access for all users on that link. For direct access entries, removal applies to the specific user or group.
Removed items are marked visually and can be reversed with the “Undo” button.
Completing a review
After the final review step, you reach the Summary page. This shows all the changes you have made across every step.
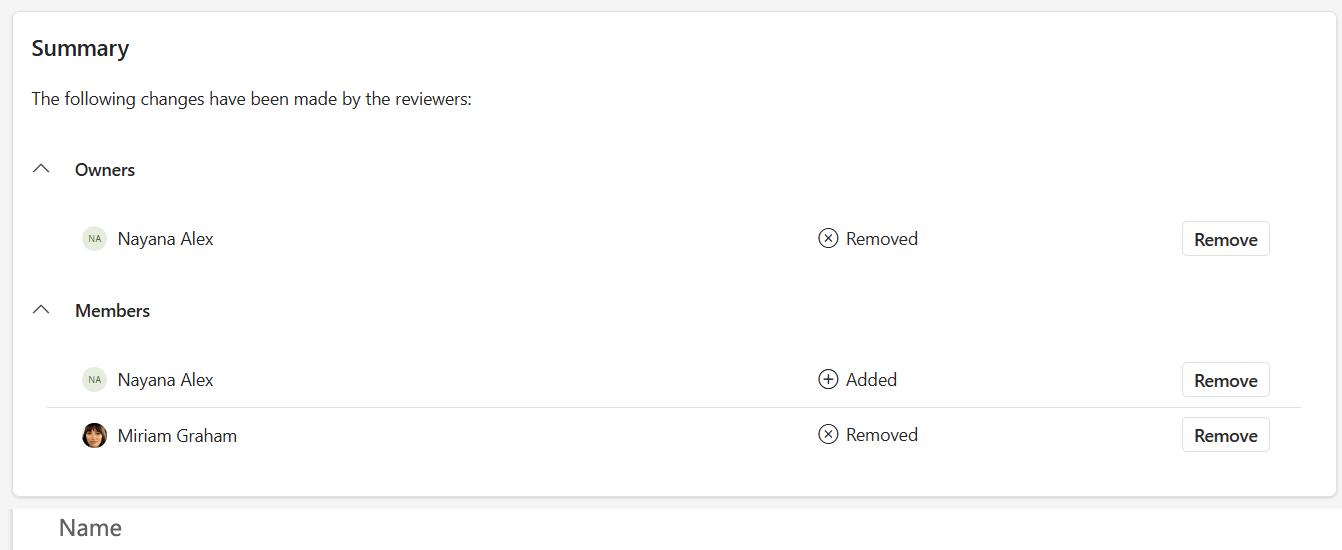
Changes are organized by step (Owners, Members, Site Access, etc.) in collapsible sections. Only the steps where you made changes are shown. Each change displays the person or item, the action taken (Added, Removed, role change), and a “Remove” button to undo individual changes before submitting.
Completing without additional action
Click “Complete” to finish the review. Your changes are applied to the workspace.
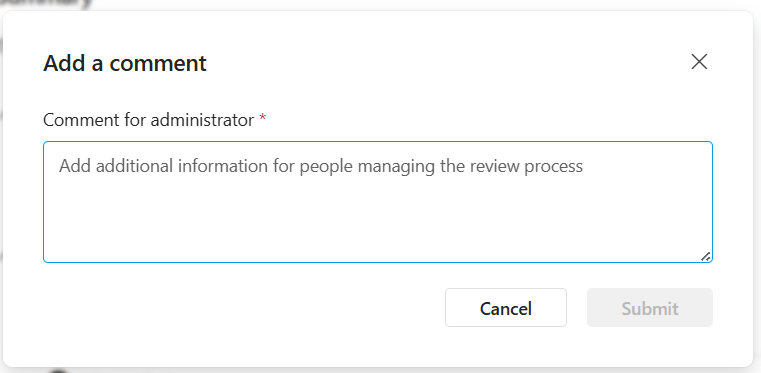
If your admin has configured a comment requirement, you will be asked to add a comment before the review is finalized. Enter the Comment and click “Submit”.
Using additional actions
If your admin has configured custom actions for the review, the “Complete” button includes a dropdown with additional options. These might include actions like:
- Archive the workspace
- Delete the workspace
- Escalate to another team
- Trigger a custom workflow (e.g., ServiceNow ticket)
Select an action from the dropdown, then confirm your choice in the confirmation dialog.
[Screenshot: Complete button with dropdown showing custom actions like Archive and Delete]
After completion
A success message confirms your review is complete. You are returned to the Active reviews tab, where the completed review is no longer listed.